How to build a garage from corrugated board (profiled sheet)
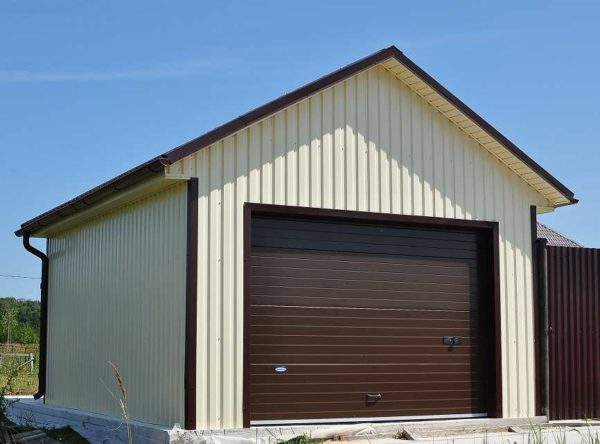
If your car requires an inexpensive parking space, you can make a garage from corrugated board. It is mounted quickly, it is not very expensive, but what is most important, perhaps, an unprofessional builder can also make it with his own hands. It is advisable, however, to own the skills of welding, but you can do without them.
The content of the article
Advantages and disadvantages
The most important advantage is that a garage from corrugated board can be made with your own hands, and for a relatively small amount and a short period of time. If the foundation is already ready, it may take up to a week to independently build a medium-sized building. Another plus is the low weight of the material. It's easy to work with it, and the foundation can be made lightweight, saving on this.
There are also disadvantages. First of all, you should think about the fact that the metal profile is not the most durable material. It is easily cut, punched out even by a strong blow. For this reason, a garage from corrugated board is built mainly in the courtyard of a private house. The second point - the metal has a high thermal conductivity and without insulation in the garage it is very cold in winter, hot in summer.
Dimensions, place on the site
When you are just thinking about building a garage, you need to decide on a place. Most often it is built near the entrance. Sometimes the gates swing open directly onto the street, sometimes a few meters recede from the entrance gate, preferring to park the car further away, under protection fence.
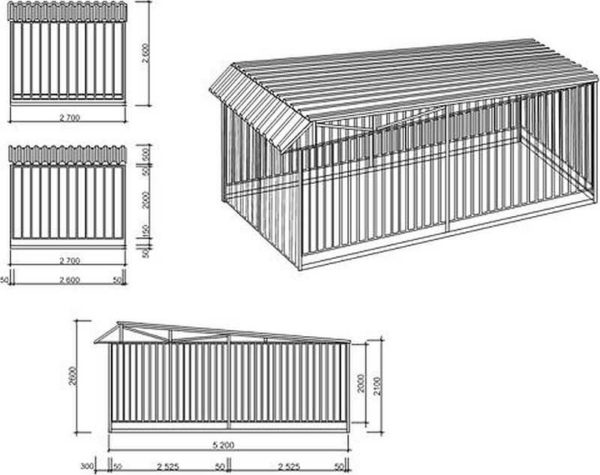
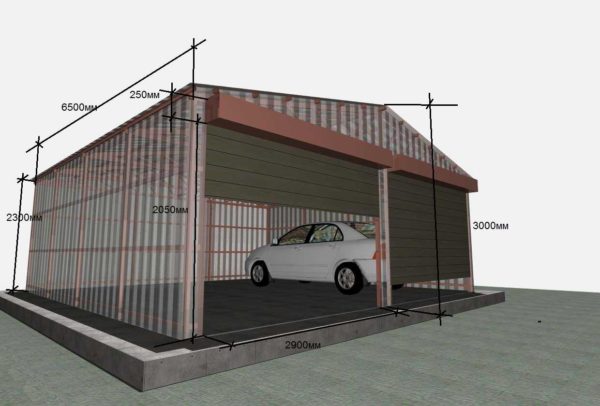
The size of the garage is chosen based on the availability of free space and the work that you plan to carry out. If you do not plan to do anything, add one meter to the size of the car (to the length and width), This will be the minimum size of the dwelling for your car. If you install any equipment, you will need to add at least another meter in length.
The comfortable height of the garage is 2.6 m, the minimum is 2.2 m.If there are two cars, the depth is considered larger in size, and a distance of at least 0.6-0.8 m must be left between the two cars.
The foundation for a garage from corrugated board
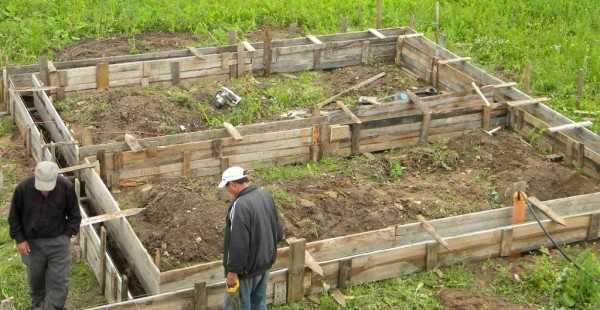
When building garages, two types are popular foundations: strip shallow or monolithic slab... The tape can be done on soils that drain water well and are not prone to heaving. In the rest, it is more reliable to make a stove. The slab costs more at the manufacturing stage, but the good thing is that simultaneously with a reliable foundation, you immediately get a ready garage floor, which remains only to align and something cover by.
Since the garage and corrugated board implies the presence of a frame, then when constructing a foundation, for a better connection, it is necessary to make outlets of reinforcement or to embed the studs, to which the frame is then attached.
There is also an economical option - not to make the foundation at all, but to dig the racks into the ground. In this case, the frame is made of thick-walled pipes. A hole is made under each rack, crushed stone is poured into it, a stand is placed (be sure to treat it with anti-corrosion compounds), crushed stone is tamped around the pipe, and poured with concrete. Next, the straps are welded to the racks, collecting a full-fledged frame. A small groove is dug between the posts. In width it is about 20 cm, and in depth, it is necessary to remove fertile soil. Crushed stone is poured into the resulting ditch, rammed.The level of the crushed stone pad should be slightly below the ground level. During installation, the profiled sheet is lowered to the rubble, leaning on it (it must be leveled). After the construction of the garage walls from corrugated board, concrete strips are laid on both sides of the corrugated sheet, which should overlap the groove. From the side of the street, you can immediately form something like a blind area - to drain water from the walls of the garage. This is not to say that this method is "correct", but this is how they do it. Especially often - in summer cottages, where the garage is only a temporary shelter.
How to make a wireframe
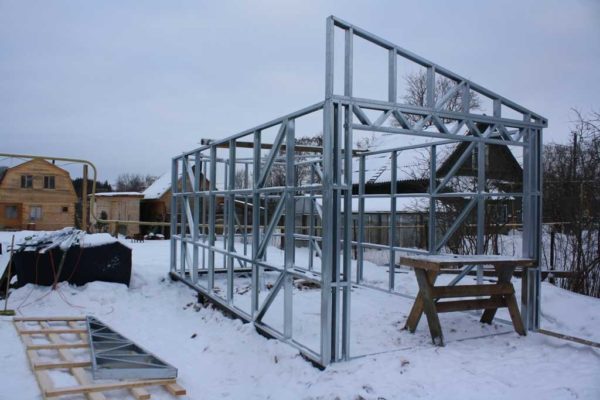
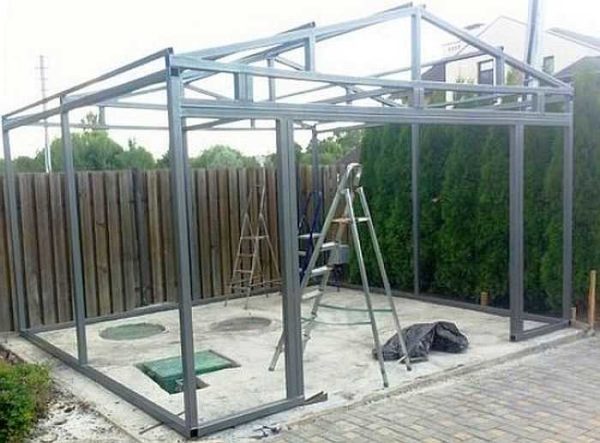
It is better to weld the frame from a profiled pipe. For racks, a section of 80 * 40 mm with a wall thickness of 3 mm is recommended; for strapping, a smaller size is possible. Another option is a steel corner with a shelf width of at least 50 mm and a metal thickness of 3 mm or more.
If welding is not among your skills, you can use a galvanized U-shaped profile for mounting corrugated board. The shelf width is not less than 50 * 50 mm. This material is cut into pieces of the required length and assembled with bolts.
Sometimes they make a frame for a garage from corrugated board from a bar. Not the best option in terms of fire safety, but in some regions, timber is the cheapest of the options. The cross-section of the bar for racks and strapping is at least 80 * 80 mm.
Having decided on the material for the frame, you need to decide in what way you will attach the lower strapping to the foundation. There are two possibilities. One has already been talked about - to brick the studs into the foundation, and the second - to fasten the harness to the foundation with the help of anchors. In this case, the harness is welded by laying out the metal on the foundation and checking the corners and diagonals. Then, the finished frame is fastened with anchor bolts.
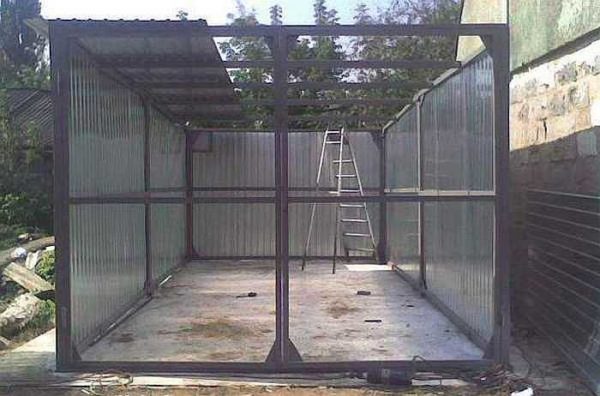
A frame for a garage made of corrugated board is usually made from a profiled pipe or a steel corner
When installing the frame, the racks are placed so that the joint of the sheets falls on them. Since the profiled sheet is mounted with an overlap in one wave, then in the calculations a useful width will be needed (there is such a parameter in the technical characteristics. This will be the step of installing the racks.
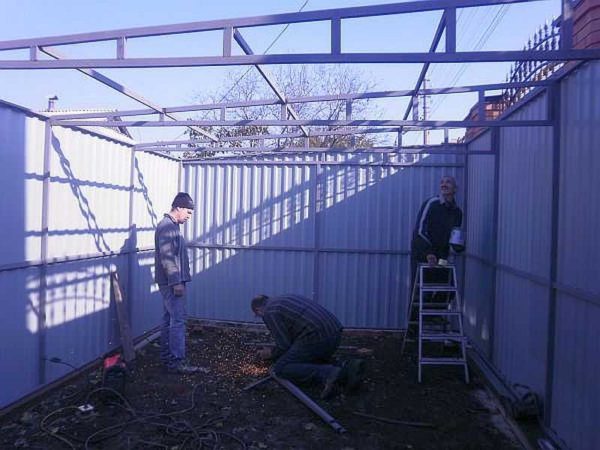
Three harness belts are attached to the racks - at the very bottom and top, and in the middle. To increase the rigidity of the structure, you can put corners (in the photo above) or slopes - parts that go obliquely from one rack to another. Under the gate, the racks are made reinforced - two pipes or corners are welded. The upper beam is also made double - the span without support will turn out to be solid so that the beam does not sag, add a second pipe.
With a small garage and a large cross-section of the pipe, you can do with only two straps - an upper and a lower one. But only in those regions where the wind is weak or the garage is protected by a wall of the house, a fence, and other structures.
Roof
In garages, a shed or gable roof is usually made from corrugated board. Both options showed themselves well, but a single-pitched one is easier to implement - less material is required for trusses and rafters, and less corrugated board consumption. The slope can be to one side (in the photo below) or back. Selected depending on the situation.
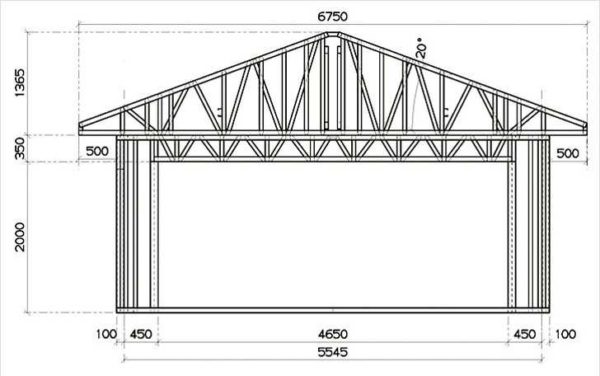
In regions with a lot of snow, pitched roofs are rarely made - for the snow to melt, a large angle of inclination is required, and this eats up most of the savings (one of the walls has to be made much higher), and the wind load increases. Here, a garage made of corrugated board is often made with gable roofs.
The angle of inclination of the gable roof of the garage should preferably be at least 20 °. With a higher slope, the roof is expensive, and with a lower slope, the snow does not come off well.
Choosing a professional sheet for a garage
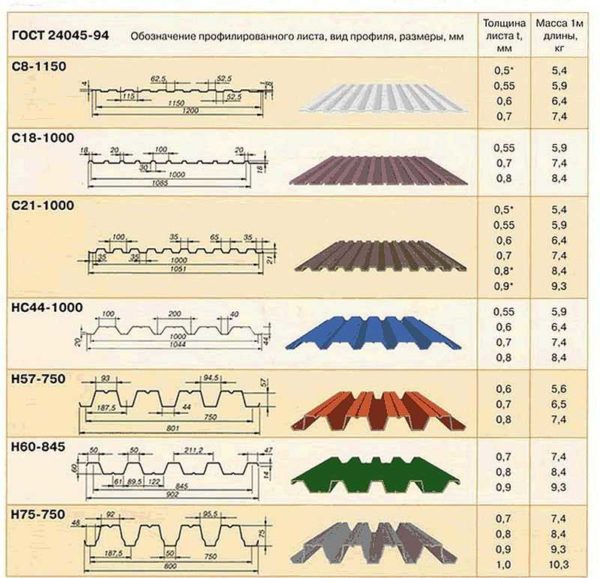
Decking is made of galvanized steel. Sheet thickness - from 0.4 to 1 mm. When building a garage from corrugated board, it makes sense for walls and roofs to choose material of different thicknesses.For the roof, the normal thickness is 0.45-0.5 mm, for walls it is better to take 0.6-0.7 mm.
The metal profile is produced for various purposes: for walls, roofs, bearing (does not require a frame). The material intended for walls is marked with the letter "C", for the roof - with the letter "K", the carrier is designated "H". There is also a dual purpose - for bearing walls, it is marked "NS". Some manufacturers put "P" before these letters, which means "corrugated board".
For the construction of a garage from the corrugated board for the walls, take material marked "C", for the roof with the letter "K". Further in the marking behind the letter are numbers. They represent the height of the wave. For example, the inscription C18 - can be deciphered as “wall metal profile with a wave height of 18 mm”. It is this material that is mainly taken on the walls of the garage. It has a sufficient degree of rigidity (the higher the wave, the more rigidity) and at the same time it is not very expensive. If desired, you can take an even tougher C21.
The width of the corrugated sheet depends on the height of the wave. The higher the wave, the smaller the width will be. In the marking, the full width of the sheet is indicated with a hyphen. For example, professional sheet НС44-1000 has a sheet width of 1000 mm, and Н60-845 is obtained with a width of 850 mm. But when purchasing, it must be borne in mind that the sheets of the metal profile are stacked with overlaps - vertical and horizontal. Therefore, material is required 10-15% more than the area covered by it.
There is one more parameter that is worth deciding - you will build a garage from galvanized corrugated board or with a polymer coating. Galvanized is cheaper, but more susceptible to weather conditions. And, although a material with normal galvanization can last about 10 years, for a non-ferrous material, the service life can be 30 years or more. Often the appearance of the garage is important, and galvanized steel looks much "simpler".
Installation rules
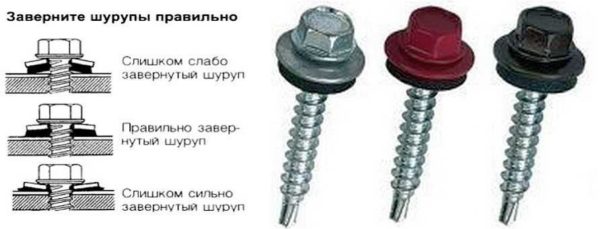
For a garage made of corrugated board to serve for a long time, you must follow the installation rules. For fastening the metal profile, special self-tapping screws with an octagonal head and a sealing washer are used. They are made of high quality steel, then galvanized. There is a rubber washer under the metal washer to ensure tightness.
When installing the profiled sheet, it is necessary to ensure that the rubber sealing gasket fits snugly to the material, but the metal should not crumple. Screws are screwed in with a hand drill, at low speeds. For installation, you will need a special nozzle for an octagonal cap, better magnetized - it's easier to work this way.
Sheet fixing rules
When mounting on walls, the screws are installed either in the groove or in the crest of the ox - no difference, but on the roof they are placed only in the crest. When installing in a groove, hardware with a diameter of 4.8 * 28 mm is used; when installed in a comb, the length of the screw is selected depending on its height. 35 mm are added to the wave height and the minimum length is obtained. Longer fasteners can be used, shorter ones cannot.
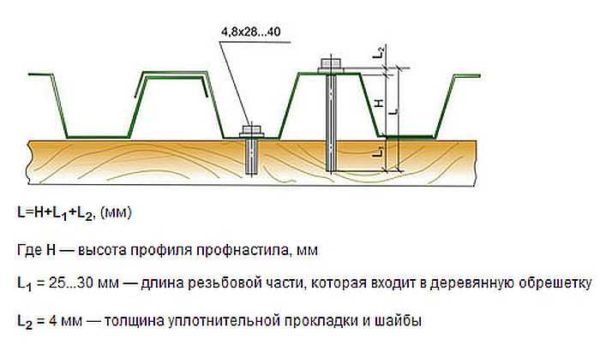
Determination of the length of the self-tapping screw for the profiled sheet when installing in a wave
The sheets are attached to the frame - to the strapping. The frequency with which the self-tapping screws are placed - through the wave, one row relative to the other - in a checkerboard pattern. In order for the strength of the connection of the two sheets to be higher, after the sheets are fixed, screws are additionally screwed in or rivets are placed in the joint.
The joints at the corners of the garage are closed with special corners. They are fastened with small self-tapping screws 4.8 * 35 mm in increments of 25-30 cm.
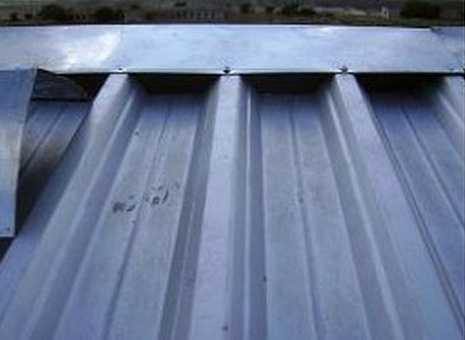
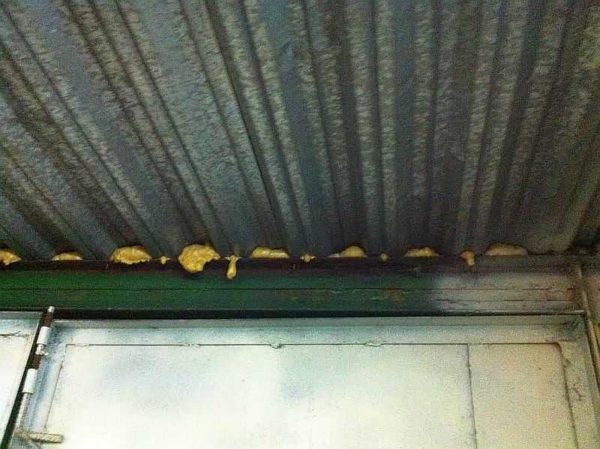
There are holes at the junction of the roofing profiled sheet and the wall sheet. They are sealed with foam, then the overhangs are sewn up with profiled sheets or some other material cut into strips. There are also sealing strips made of polyethylene foam. They are special for certain profiles, they repeat the waveform, and there are universal ones - just a strip.
Warming
It is worth insulating the garage from a profiled sheet only if you will heat it. It is worth knowing that with proper insulation, a decent area is "eaten up" by you - the insulation itself, the ventilation gap and the inner lining will take 7-10 cm. For insulation, two materials are usually used - basalt wool in hard mats or polyurethane foam (foam ).
How to insulate with mineral wool
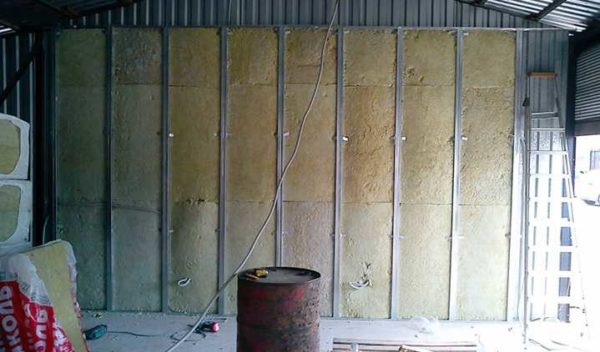
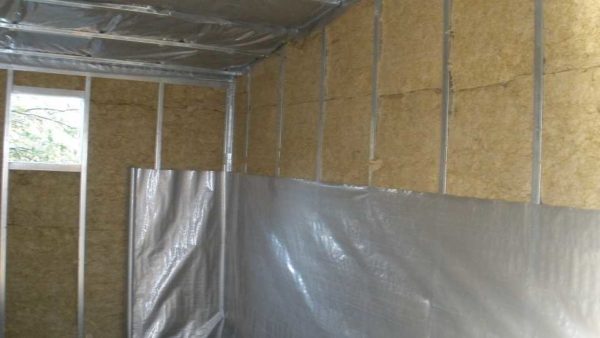
For the installation of mineral wool, a crate is required - although the slabs are rigid, they cannot stand on their own, they need support. A crate is assembled from boards with a width equal to the thickness of the insulation or from a galvanized profile with the same shelf. Attaches to the frame in 2-3 cm increments less than the width of the mat. With this step, the insulation becomes a bullet, it stands firmly and does not require additional fixation. But for reliability, it still needs to be fixed with special "self-tapping umbrellas", which are screwed into the pipes / corners of the strapping.
After the installation of the insulation, the counter-lathing is stuffed from the strips 3 cm thick. Its direction is perpendicular to the battens. These three centimeters are the ventilation gap, which is necessary to remove moisture that will accumulate in the insulation (condensation that occurs due to the temperature difference between the room and the street). Mineral wool will not “live” even the season without a ventilation gap. If it is saturated with moisture, and then freezes, it may simply crumble after defrosting. And since the garage is usually heated from time to time, then a few such frosts are more than enough. Therefore, either use a different material, or make a gap for ventilation.
To close the mineral wool from the increased importance, which sometimes happens inside the garage, a vapor barrier membrane is laid over the counter-grill. It should prevent moisture from entering the room, but not prevent it from leaving the insulation. When installing a vapor barrier, they try to make it airtight. To do this, one canvas goes over another by at least 10 cm, the joints are glued with double-sided tape. The vapor barrier is attached to the crate with strips (on nails, screws or staples).
On top of all this pie, the inner lining is stuffed. It is very moisture-resistant plywood or OSB, but other sheet materials can also be used - GVL, GSP and others. The latter are even preferable, since they do not burn.
Foam use
By itself, foam as insulation is not bad, but not in this case. A garage made of profiled sheet will heat up to solid temperatures in summer, and the heated foam will release substances harmful to health. This is one drawback. The second - it is not clear how to fix it. Usually they are attached to the wall with self-tapping screws with large plastic hats - umbrellas, but this method does not work with corrugated board - you will not perforate it.
There is an option - to install on sealant or polyurethane foam. Polyurethane foam fixes well, but is hygroscopic. Without the presence of a ventilation gap, saturated with moisture, it will become an excellent breeding ground for mold, fungi, and insects.
The sealant is not hygroscopic, but expensive, because a composition with the ability to operate in a wide temperature range is required. It is necessary that it be frost-resistant and tolerate heating to significant temperatures.
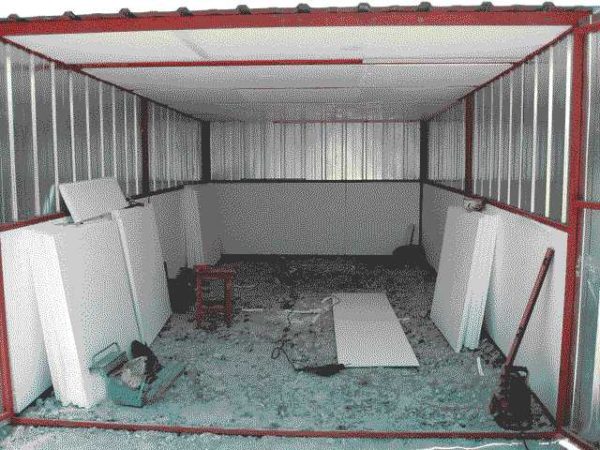
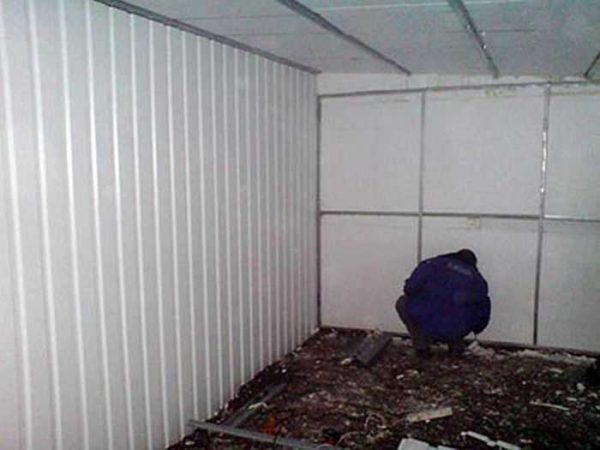
Another option is to make a crate from a galvanized profile. Its step is 1 meter, since this is the standard size of the foam block. In this case, they can be inserted and attached to the crate.
Warming with the help of polyurethane foam applied from the apparatus in a continuous layer is becoming more and more popular. In this case, there are no problems with fastening, but these services are paid - special equipment is required. But no hassle with the installation.
In general, this is all about how to make a garage out of corrugated board with your own hands. There are many more points and nuances, but they are mostly individual. Read about how to make a floor in a garage. here, and how to cover the concrete floor is described here.

