How to build a sandwich panel garage
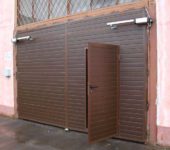
If you need a pre-fabricated, inexpensive and warm garage - pay attention to the sandwich panel. This material is lightweight, which allows you to make a lightweight foundation. In addition, it comes immediately with a paintwork inside and outside, so finishing work is also not needed. It is assembled on a metal, less often - wooden, frame in a few days (subject to the availability of a ready-made foundation). So a sandwich panel garage is not a bad option.
The content of the article
What are sandwich panels made of?
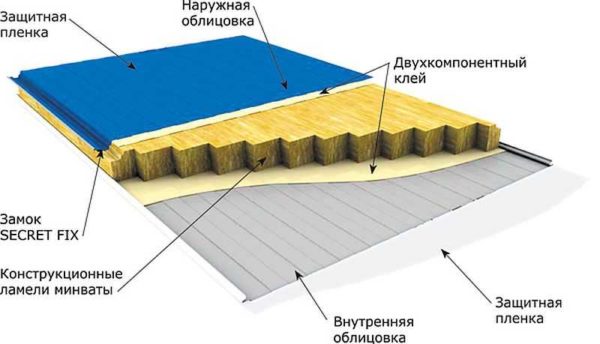
Sandwich panels are a three-layer structure that consists of two outer layers of rigid material and insulation located between them.
Hard material - most commonly galvanized steel. And it is this material that is usually used when building a garage from sandwich panels.... And they also come from sheet polymers, wood-polymer composites (WPC), chipboard materials (OSB, plywood, gypsum fiber board, GSP, etc.).
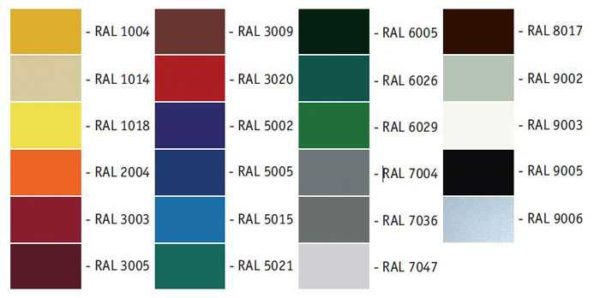
When used as an outer shell of galvanized steel, it is covered with a protective and decorative coating. Most often it is one of the tinted polymers. The most common are polyester and pural (pural is better in performance, stronger and more durable). The polymer film increases the service life of the material and makes it insensitive to aggressive environments. The color of the covering of the galvanized metal sandwich panels is selected according to the RR and RAL tables and in total it can have more than 240 shades.
The insulation used in sandwich panels is different:
- Basalt wool. It has good characteristics, but it is afraid of getting wet (it loses its insulating properties), and it absorbs water in the form of liquid and vapor. When frozen in a wet state, after thawing, it can simply crumble. To eliminate this drawback, it is necessary to ensure the sealing of the sections, which is problematic when building a garage.
- Glass wool. She is not afraid of moisture, but working with it is very problematic - you need full protective clothing - thick clothing, a hat, gloves, high shoes, plus a respirator and goggles. The material is very prickly, and the smallest particles penetrate everywhere. It has good characteristics, but is rarely used.
- Expanded polystyrene. Lightweight honeycomb material. It is not afraid of moisture, has very good thermal insulation properties, and belongs to low-combustible materials. Its disadvantages are crumpling under loads (compensated by the rigidity of the outer shell), insects and small animals like to gnaw it. Not a bad option, but not the best.
- Polyurethane foam. Excellent thermal insulation material, the characteristics of which do not depend on moisture. It does not rot, bacteria and fungi do not multiply in it, insects and rodents do not like it. The disadvantage is the high price, respectively, and sandwich panels with such filling are more expensive.
If possible, it is better to build a garage from sandwich panels with polyurethane foam insulation. Although it will turn out to be more expensive, there will be no problems even if the humidity rises.
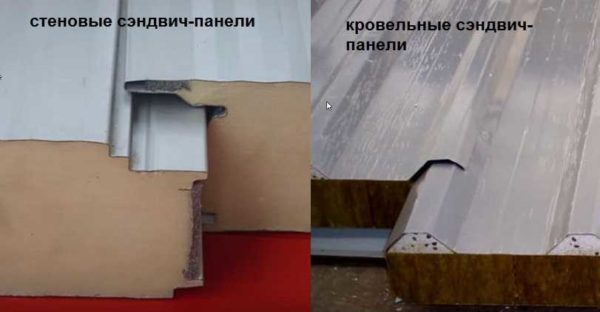
By the type of profile, sandwich panels are wall and roof panels. They differ in profile shape (corrugation height) and sizes:
- Walls are:
- width from 1000 to 1200 mm:
- thickness from 60 to 260 mm.
- Roofing:
- width - 1000-1600 mm;
- thickness 20-260 mm.
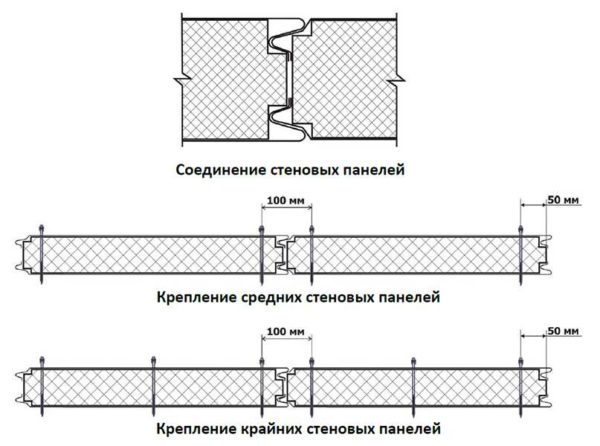
The sheets of sandwich panels are connected to each other with locks of different shapes. For wall ones, the lock is usually "tongue-in-cheek", for roofing ones - "overlap".
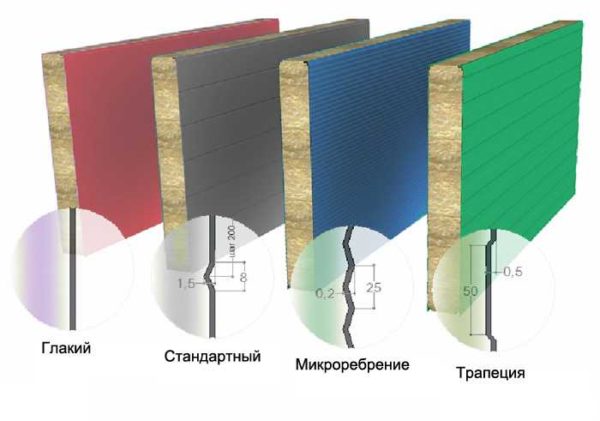
Wall panels can be with smooth or profiled walls.Profiles can be ordinary (corrugation of different heights / widths) and can be decorative.
Mounting and fastening
The sandwich panel garage belongs to the category of frame buildings. A metal frame (made of profiled pipes) is usually assembled under them, to which the panels are attached with self-tapping screws. In order for it to provide the required load-bearing capacity, the minimum pipe wall thickness must be 1.5 mm. For a small garage, racks can be made from a pipe of 150 * 50 mm, for more solid ones up to 150 * 150 mm.
Such a large width of the pipes is explained by the peculiarities of the installation of sandwich panels - they are attached to the frame, stepping back from the edge of 50 mm. So it turns out that when two panels are connected, the distance between the two screws will be 100 mm. With a rack width of 150 mm, 25 mm remains for greater fastening strength.
The roof truss system of the garage from the sandwich panels is assembled as usual - from a bar or cooked from the same profiles as the frame. The minimum slope of the roof covered with this material is 10 °.
A frame for a small garage, for one or two cars without superstructures, can be made of dry timber with a section of 150 * 150 mm. It is pretreated with bio-protective compounds, then with fire retardants.
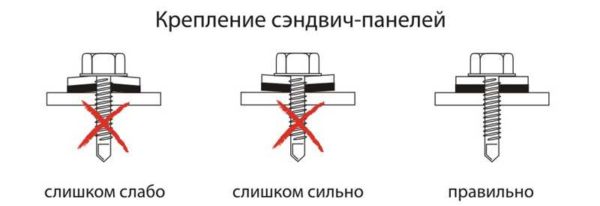
The sandwich panels are fixed with special self-tapping screws (self-tapping screws). They are made of hardened steel, covered with a layer of zinc. This fastener has a 5.5 mm diameter and an octagonal head. Sometimes, rubber sealing washers are used to ensure tightness. When installing them, make sure that the washer is tightly pressed against the material, but the screw should not deform the outer layer.
During installation, the screws are placed strictly perpendicular to the surface, preventing deviations, otherwise there is a high probability that the metal will be damaged and water will flow into the panel, which will cause its destruction.
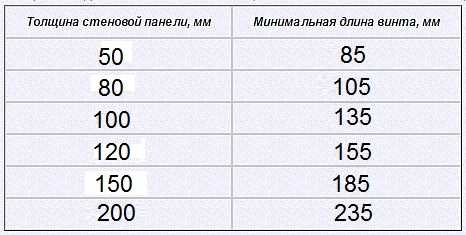
The minimum fastener length depends on the panel thickness and is shown in the table below. In general, the self-tapping screw should be screwed into the frame by at least 35 mm. That is, its minimum length is the thickness of the panel, plus 35 mm.
The number of screws per square meter depends on the type of building and wind loads in the region. When building a garage from sandwich panels in Moscow and the region or in St. Petersburg, it is enough to screw them on the sides of the panel with a step of 300-400 mm.
When installing on a metal frame, a rubber sealing tape is glued to the posts and cross members. On one of its sides there is a sticky layer protected by a strip of paper. Before installation, the paper is removed, the tape is glued to the frame posts.
Installation methods for wall panels
Installation of wall sandwich panels can be vertical and horizontal. A frame is made for each of them, taking into account the peculiarities of the fastening in each case. The distance between the posts is equal to the width of the selected material type. Only the first racks from the corner have a smaller distance (by 150 mm if racks 150 * 50 mm or 150 * 150 mm are used).
For horizontal installation, the first sheet is placed directly on the base. For better thermal insulation, you can put foam or expanded polystyrene under the panels. The lock must be turned so that the grooves are outside. This will prevent water from flowing into the joint.
With vertical installation, the sheathing with wall sandwich panels starts from one of the corners. The direction of the lock is arbitrary. For better thermal insulation, you can also put foam or expanded polystyrene under the panel.
Regardless of the type of stacking, before fixing the sheet, it is necessary to check whether it is correctly positioned. Take a level and check the verticality or horizontal positioning. Only then are the fasteners installed.
During installation, one of the disadvantages of buildings made of sandwich panels can be eliminated - the lack of insulation in the seams, due to which the premises are blown out and quickly dry out.To improve the thermal performance, an assembly tape, butyl rubber cord or thin insulation is placed in the joint. Sometimes, to ensure tightness, the joint is coated with a sealant. This is especially true when installing a roof, but it will not hurt for garage walls either. During the joining of the plates, it is important to ensure the tight abutment of the sheets to each other, but at the same time, the thermal insulation material must not be crushed.
After installation, the corners and side joints of the sheets are laid with insulation and covered with decorative corners or strips. The color is chosen to match the base coat or a contrasting color.
Roof installation
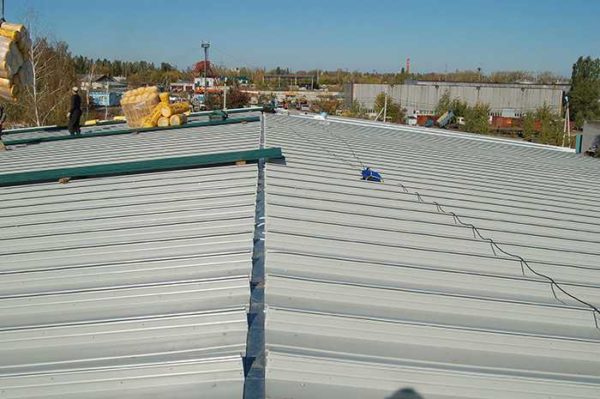
A sandwich panel roof is made after wall cladding. Few of the private garages are more than 12 meters long, so it is best to lay roof panels in full sheets along the overhang. This will avoid creating vertical seams that are difficult to seal.
If the rafter system is assembled from metal, a rubber seal is glued to the beams and girders, then installation begins. When flooring, the lock is turned with a spike upwards - towards the ridge. Before joining, the junction of the sheets is coated with silicone sealant. This ensures a good sealing of the roof.
When installing roofing se-sandwich panels, longer screws are needed - the wind loads are greater (see the table below).
There are also mounting features:
- First, you can fix the sheet with just two screws. After covering the entire surface, install the remaining screws.
- Fasteners are installed at the top of the wave, starting from the top, moving downward.
- Along the plane of the roof, the installation step is 500 mm.
- Self-tapping screws are placed along the overhang with a step of 250 mm.
- After fixing all sheets, an overlapping wave is additionally attracted. To do this, use self-tapping screws with a rubber gasket with a diameter of 4.8 mm and a length of 28 mm. The installation step is at least 500 mm.
After the installation of the roofing sandwich panels is completed, they start finishing the overhangs and ridge. They are sewn up with fittings made of galvanized metal with a corresponding color. When installing, it is important to ensure tightness, for which the elements are installed with an overlap of 80-100 mm. Additionally, the joints are coated with sealant for outdoor use.
All additional elements are fastened with self-tapping screws with a diameter of 4.8 mm and the required length. The use of a rubber seal is mandatory.
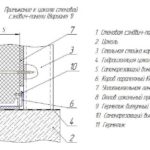
Node diagrams
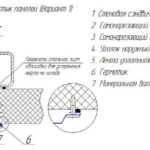
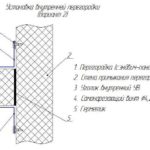
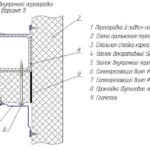
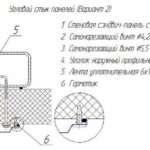
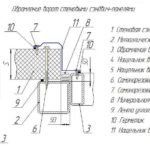
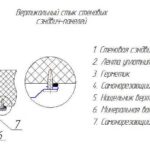
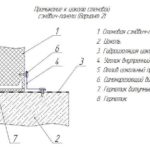
Not everything can be explained in words, more often a graphic image conveys more information. The main components that can come in handy when you build your garage with sandwich panels are collected in this section. Everything is drawn in detail and signed.
- Corner joint of panels (option 1)
- Installation of an internal partition (option 2)
- Installation of an internal partition (option 1)
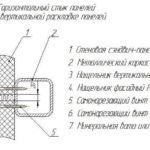
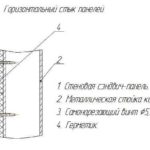
- Horizontal joint for vertical layout
- Horizontal joint of sandwich panels (drawing)
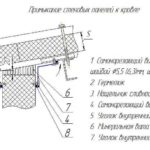
- Adjoining wall panels to the roof
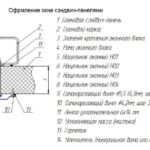
- Window block decoration
- Corner joint (option 2)
- Gate (doorway) decoration
- Sandwich panel vertical joint diagram
- Connection to the plinth (option 2)
- Connection to the plinth (option 1)
Storage and operation rules
It is necessary to store the sandwich panels on a flat area. If not, use blocks or other similar material, the surface of which will create a flat surface. You can put bars with a step of 1.5-2 meta, but you need to make sure that they are in the same horizontal plane.
The service life of the material depends on the integrity of the polymer coating. Therefore, during storage and during operation, try not to damage the surface. When scratches appear, they are degreased and painted over with repair compounds.
When a garage is built from sandwich panels, they have to be cut in places.If the insulation is mineral (basalt) wool, this should be done in a respirator. If the insulation is glass wool, then closed clothing, protective gloves and glasses are also needed.
Metal can be cut with metal scissors (manual or electric). The use of angle grinders (grinders) with a disc is prohibited: when cutting, the metal in the cut area is very hot, the zinc coating evaporates. As a result, after a short period of time, the cut begins to rust.
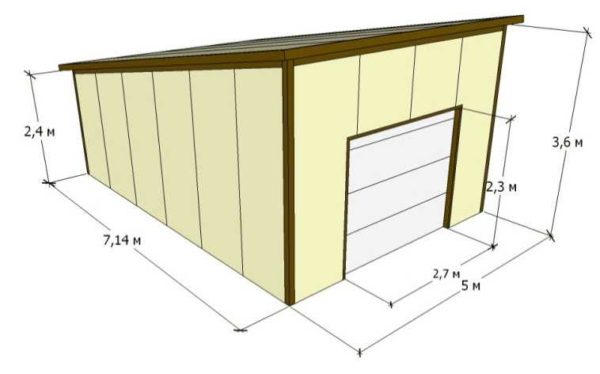
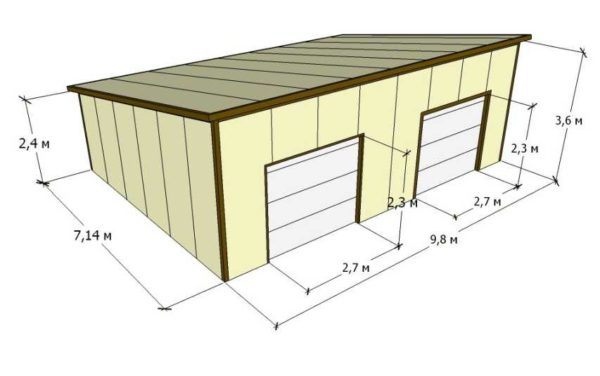
Sandwich panel garage: dimensions and designs
Finding ready-made garage projects from any material is quite difficult. A full-fledged project is not always ordered, even for the construction of a house, and there is nothing to say about outbuildings. However, when planning a garage from sandwich panels, you inevitably ask yourself about the optimal size. If we talk about the minimum, then they believe that the width of the garage should be 1 meter more than the width of the car, and the length should be 1.5 meters. This is if you plan to install at least some equipment. With this size, it can be placed against the back wall. If there is no equipment, it is enough to add 1 meter to the length of the car.
If needed observation pit, it is done by shifting a little closer to one of the walls, and usually to the left. On this side, space is left so that the doors in the garage can be opened without problems. To make it more convenient upon arrival, boards of 40-50 mm thick are laid on the pit. They can easily withstand any passenger car.
If there are two cars, the distance between them should not be less than 60 cm, and for comfort it is better to leave the same meter.

