Dimensions of curbs and curbs, how to install correctly
Curbs and curbs are needed to separate pedestrian areas from carriageways. They are also, but smaller, used to delimit pedestrian zones, lawn separation. In general, for landscaping. And not only in public places, but also in private backyards. What sizes of borders are there in general, where which ones are used, what types. You need to know about this if you have to make paths in the garden or blind area at home... It is also desirable to separate it, and it is most convenient to do this with a concrete divider.
The content of the article
The difference between a curb and a curb
As you can imagine, the curb and curb are elements that fence off the sidewalk from the carriageway or delimit different zones of pedestrian paths (for pedestrians and bicycles, for example). So how is the curb different from the curb?
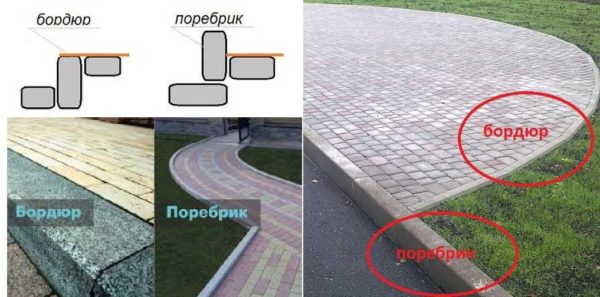
What is the difference between a curb and a curb - the way of installation. Namely, at what height is its top
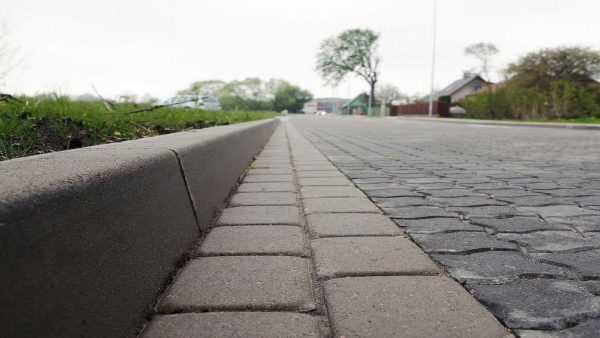
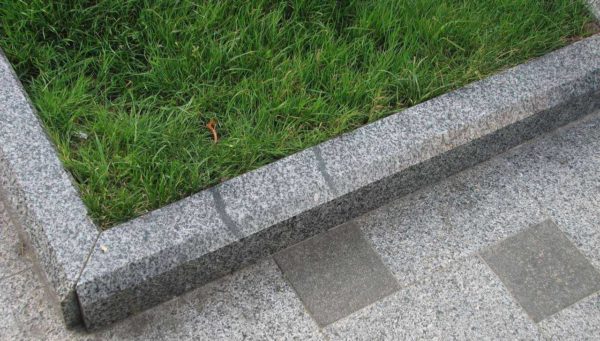
If you thought it was in size or shape, then you were wrong. They are made from the same elements, which manufacturers call a side or curb stone. The only difference is how they are installed. If the surface of the curb is flush with the coating, then this is a curb. If part of the height protrudes above the coverage level and forms some kind of obstacle, this is a curb. That is, it depends on how deep you bury the curb block.
Types of borders according to the standard
In general, it is correct to talk about the types of side stones. The side stone is a dividing element in the construction of roads, sidewalks, and pedestrian zones. Prevents formation of soil on the paved part. It is a product made of concrete or reinforced concrete (reinforced concrete) that has a large length and a small cross-sectional area. Differs in high resistance to loads, static and shock loads. All its characteristics and properties are described in GOST 6665-91.
According to the standard, the curbs are made of sand concrete or heavy concrete (with gravel aggregate). Brand - not lower than M300, but is selected depending on weather and climatic conditions. Oddly enough, but for the mid-southern regions a higher grade is required than for the northern ones. The fact is that higher grades have a higher level of frost resistance. In this climate, there can be up to 20 freeze / thaw cycles in one winter. So the minimum acceptable frost resistance is 400 cycles (F400) and higher.
Standard types of curb stones
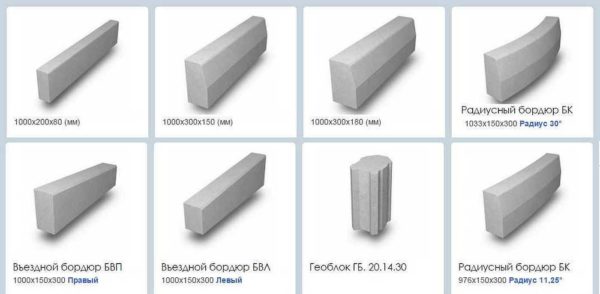
Borders are used to separate roads, sidewalks and green areas, decorate flower beds and separate trees. In general, the scope is wide. To create the required relief, not only straight lines, but also curved elements are needed. These are the types defined in GOST:
- Direct:
- BR - privates;
- BU - with broadening;
- BUP - with intermittent broadening;
- BL - with a tray;
- Entry - BV;
- BC - curvilinear;
- Stone ramp.
According to the standard, the curbs that separate the sidewalk from the roadway must be made of concrete with a strength class of at least B30. If it is necessary to separate footpaths from lawns, the strength can be B22.5.
Legend
The markings put the name of the stone in the form of letters, and then indicate the length, height and width. In that order, separated by dots. Dimensions are in centimeters. Then the class of the reinforcement is indicated, if any.
Example of marking and its decoding:
- BR 100.30.18.It reads like an ordinary curb (straight) without reinforcement 100 cm long, 30 cm high and 18 wide.
- BK 80.30.15 - AV. The decoding of such marking is a curved border (actually a side stone) 80 cm long, 30 cm high, 15 cm wide. The class of reinforcement is AV (A5).
Sizes of curbs according to GOST
The standard length of the side stone is available in three versions: 100 cm, 300 cm and 600 cm. The height of privates is 15 cm and 18 cm, 1 meter and 3 meters long, six-meter ones may have another 20 cm.
Please note that the bevels, their shape and size are also spelled out. Possible options are also described. So, in the marking, the width is affixed to the widest part. This is usually the sole.
| Marking | Length, mm | Width, mm | Height, mm | |
|---|---|---|---|---|
| BR 100 | 1000 | 300 | 150 and 180 | There is also BR 100.20.80 - with a width of 20 cm and a height of 80 cm, it is usually called a garden |
| BR 300 | 3000 | 300 and 450 and 600 | 150 and 180 and 200 | |
| BR 600 | 6000 | 300 and 450 and 600 | 150 and 180 and 200 | |
| BU 300 | 3000 | 290 and 320 | 300 | The width in the marking is affixed to the "sole" |
| BUP 300 | 3000 | 290 and 320 | 300 | Width is measured at the widest part |
| BUP 600.30.32 | 6000 | 320 | 300 | |
| BL 300 | 3000 | 680 and 930 and 1180 | 320 | Width is measured at its widest |
| BV 100 | 1000 | 150 and 180 | 300 | |
| BK 100 | 1000 | 180 and 200 | 300 | Rounding radius for BK 5 - 5000mm for BK 8 - 8000mm for BK 12 - 12000mm for BK 15 - 15000 mm |
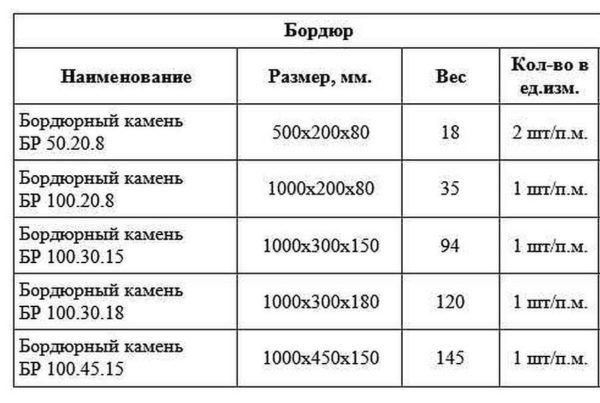
There may still be questions about curved curb blocks. GOST allows the production of roundings with a radius of 5, 8, 12 and 15 meters. There is a postscript in the standard that it is allowed to manufacture copies of other sizes by agreement with customers. Since almost all of the listed options are too massive for a private courtyard, factories often make smaller curbs. For example, BR 50.20.80. Its weight is about 18-20 kg, so it is quite possible to install it yourself.
Curb weight
Since the curb and curb can be made of concrete with different aggregates, its weight may differ. The standard indicates the reference weight, but the exact one must be checked with the manufacturer.
One meter long curbs can be made of sand concrete or heavy concrete, longer ones - 3 and 6 meters - only from heavy concrete. Sand concrete be sure to vibrate so that they are strong enough. The use of additives that increase strength and frost resistance is allowed.
| Curb stamp | Weight, kg | Curb stamp | Weight, kg | Curb stamp | Weight, kg |
|---|---|---|---|---|---|
| BR 100.30.15 | 100 | BR 600.20.-А-IV (A-V) | 760 | BL300.32.118 | 1690 |
| BR 300.30.15 | 320 | BR 100.20.8 | 40 | BV 100.30.15 | 100 |
| BR 600.30.15-A-IV | 640 | BU 300.30.29 | 400 | BV 100.30.18 | 120 |
| BR 100.30.18 | 120 | BUP 300.30.29 | 340 | BK 100.30.18.5 BK 100.30.18.8 BK 100.30.18.12 BK 100.30.18.15 | 120 |
| BR 300.30.18 | 380 | BU300.30.32 | 470 | BK 100.30.21.5 BK 100.30.21.8 BK 100.321.12 | 140 |
| BR 600.30.18-A-IV | 770 | BUP300.30.32 | 410 | Stone ramp | on the project |
| BR 300.45.18 | 580 | BUP300.30.32-A-IV | 790 | ||
| BR 600 45.18-A-IV (A-V) | 1170 | BL300.32.68 | 1050 | ||
| BR 300.60.20 | 880 | BL300.32.93 | 1370 |
Vertical and horizontal edges must be perpendicular. The maximum permissible deviations have been established - they do not exceed 3-4 mm.
Custom border sizes
Agree, such large and massive curbs are not needed to equip a personal plot. Rather, they are very rarely needed. Perhaps the smallest ones in order to fence off the path for the car from the lawn / garden. Here their strength is required so that all beauty does not disperse. And the rest are applicable when constructing roads.

For a garden and driveway, these options are more acceptable. Not only do they look better, they weigh and cost less.
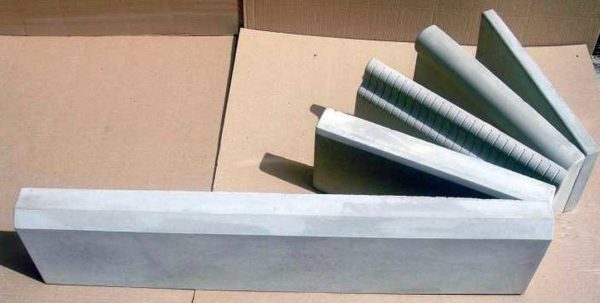
Therefore, manufacturers of the same paving slabs make curbs according to their own sizes. Such products are called lawn or garden borders. By the way, the standard does not prohibit the production of curbs of other sizes. Only they must have a strength of at least B22.5 and a frost resistance of at least F200. You can find such a name as a standard size border. This is that such a size is often found. But not that it is spelled out in the standard. Here are the sizes of the curbs for paths in the garden or yard:
- 500 * 200 * 80, the weight of one piece is about 20 kg;
- 390 * 190-90 and weighing about 15 kg;
- 500 * 240 * 35, weight 9 kg.
In general, the sizes of the borders are different. Length from 80 cm to 40 cm, height - about 200 mm, width - from 3.5 cm to 10 cm. They can be "standard" gray. Colored ones are slightly more expensive. The colors are usually the same as those of the paving slabs. Most often it is red, brown, green, sometimes yellow.Note that the colors are not "pure", but with an admixture of gray cement.
There are also granite curbs. They also come in several sizes:
- length from 70 cm to 2 meters,
- width - from 80 mm to 200 mm,
- height - from 150 mm to 600 mm (150, 200, 300, 400 and 600 mm).
Granite curbs, of course, are beautiful and very durable, but they are very heavy and very expensive.
Installation instructions
It will be about installing not those large and massive curbs that are for separating the road, but lawn or garden curbs that are needed to separate the garden path. Never mind what are you planning to pave the path with - with tiles, stone or other covering, so that it does not blur, limiters are needed. Most often they make a low curb. That is, the top of the path fence is a few centimeters above the path surface and the garden / vegetable garden / flower garden on the other side. In this case, when watering or rain, the soil will not wash over the track.
Work order
So, here is the order of installing the border:
- Draw a path on the ground. To do this, you can use a dense plastic bag, into which we pour sand. We cut off one corner, we get a thin stream of sand, which is convenient for applying markings. If you need to fix something, that's not a problem either. Worn out, painted over again.
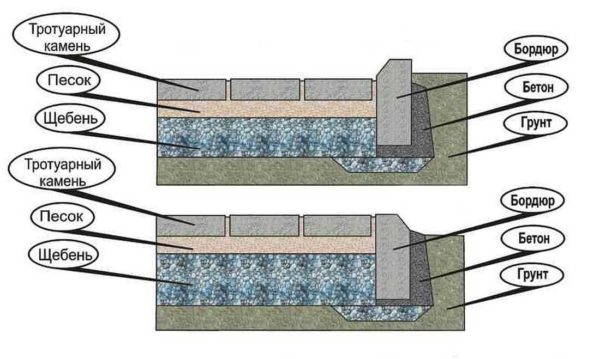
- Digging a trench. Width - 30-40 centimeters, depth - about 20-30 cm. In general, the depth of the groove for installing the curb depends on the height of the curb. Rather, the part that you are going to bury. There should be crushed stone bedding and a layer of concrete under it.
- We level the bottom of the trench, compact the soil. You probably have a rough idea of how to align. And what to ram? You know how to cook and have a welding machine, take a piece of thick metal, weld a piece of a rod or pipe to the middle, and a crossbar-holder on top. Get a normal rammer. It will also be required when leveling the surface under the track. No welding machine? Do the same with wood. Also not bad, although the weight is less.
- Next, pour crushed stone onto the leveled and compacted bottom. The layer is about 10-15 cm. We level it too and ram it until the trace from your foot is visible on it.
- We take pegs and ropes. We fill the pegs and stretch the rope. The height of the rope is the top of the curb. We check the horizontalness of the thread with a building level. It will serve as a guide when setting the curb in height.
- Knead sand-cement mortar grade M300 or higher. We spread it under the thread in an oblong slide. We install a border on the prepared pillow, align it along a stretched thread. The bottom edge should be recessed into the concrete by at least 5 cm. If such a layer does not work, add concrete on the sides on both sides.
That's all. Then we continue in the same spirit: we laid out the cement, installed / leveled a piece of the border. We coat the joints of two fragments of the border with a layer of cement. We remove its remnants immediately after installation and alignment. If it dries up, there will be ugly traces, which are not easy to get rid of. If installation of one curb takes a little time, you can spread the solution on several curbs at once. It will be faster this way.
Features and subtleties
Most of the questions are usually about rubble. Not everyone puts it down. You can do without rubble if the soil is sandy. Then just level the bottom of the trench and you can work on. But if the soil is clay or loam, black soil, then without gravel bedding in the spring, the curbs simply squeeze in different directions. So here gravel gives an increase in durability. Can I use gravel or construction waste instead of crushed stone? It's better than nothing, but not the best option. Especially a brick fight. It will collapse over time and turn into crumbs, the curbs will sag. So, better not, but there - see for yourself.
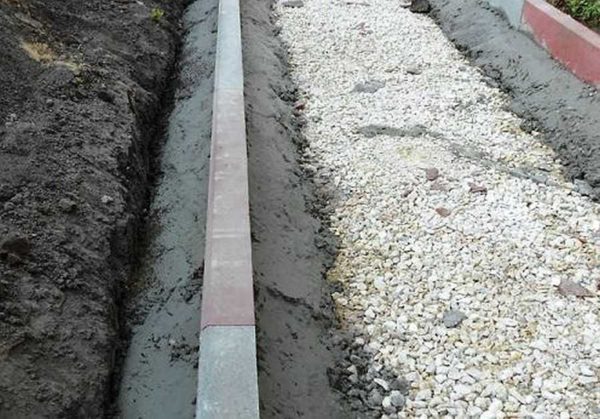
We select the dimensions of the curbs (height) taking into account the fact that the part must be buried
One more point. Clay, black earth and loam are amazingly fast "eat" gravel. He drowns in them. If you want a long-lasting track, lay geotextiles at the bottom of the trench. Its edges should go behind the trench. Just spread them around the edges. When the curb was installed on cement, the edges of the geotextile were wrapped, and the concrete was covered with foil. After a week, you can remove the film and cover the trench with earth. In this case, the edges of the geotextile can be left unfolded. Then the rubble will not be washed out.
A few words about how much solution to mix. Depends on how fast you work. If you have little experience of such work, it is better to make a very small batch for the first time - for two or three stones. The fact is that if the concrete starts to set, it will have to be thrown away. It will not recover if water is added. No, you can get the desired consistency. But concrete itself will be from the word "nowhere". It may not gain strength at all or be very tiny. In some cases, so much so that you can just pick it out with your finger.

