DIY imitation brickwork
One of the fashionable trends in interior decoration is a brick wall. Good for those who have a brick house. All they need is to beat off the plaster and slightly "shaman" what is available. What should the rest of us do? There are wallpapers and tiles "like a brick", but not all of them are far from being believable, and good ones stand almost like a natural brick wall. The best option in this case is a self-made imitation brick for interior decoration. Moreover, "bricks-tiles" can be done separately, or you can arrange the entire wall in one go.
The content of the article
How to make an imitation of a brick wall: a short list of ways
The easiest way is if you have brickwork hidden under the plaster. Cover the plaster, clean the seams, prime and paint. The result is a natural brick wall. Moreover, it will look quite "old" and vintage. Those who are less fortunate will have to imitate this brickwork. The good news is that there are many ways, inexpensive materials are available, you can make a "brick wall" on concrete, drywall, plywood ... any more or less durable surface. By the way, most techniques take little time. So, here's how you can make an imitation brick for interior decoration:
- Make a "brick tile" by sawing a regular brick into plates.
- Draw with acrylic paints.
- Print the picture and use it as wallpaper.
- Make a silicone mold with an imprint of beautiful bricks and cast plaster tiles in it, imitating a brick.
- Imitate brickwork with plaster mortar, tile glue, decorative plaster. Make seams:
- with scotch tape;
- cutting through and removing excess;
- squeezing out the seams with a template.
- Cut from thin foam.
- Cut from drywall.
- Make a frame out of thin strips. Planks are seams, between them fill the space with mortar. These will be bricks.
This is just a short list. There are several technological differences at each point. So imitation brick for interior decoration can be done in at least a dozen ways. Let's talk about some in more detail.
Sawn brick
It seems reasonable to have the idea of replacing the expensive brick-like finishing tiles with bricks loose on plates. But brick is needed of good quality, without voids, irregularities, underfiring or burnt places. In general, a brick is needed expensive. Or old.
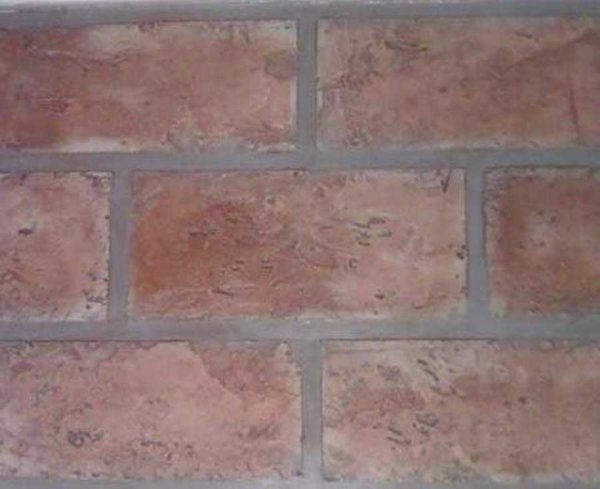
It is better to cut it with a circular saw with water cooling. The result is a decorative brick-like tile in a natural color. Tile thickness - at least 8-10 mm. The advantages are clear: low price, no need to paint - there is a natural color. This homemade brick tile is then glued to the walls using regular tile adhesive.
- We lay out any texture from the sawn brick
- For a more pronounced color, you can cover with a matte varnish
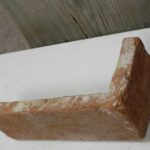
- And this is for decorating outer corners
But there are also disadvantages: you need a brick of good quality, but you still have to find it. Plates can break when sawing. Only two of them are obtained with a beautiful surface - the extreme ones.The rest will have to be finalized manually, creating a relief. It is dreary, dusty, long, difficult, and it is not a fact that imitation of a brick will really learn "at the level".
For all its disadvantages, this method is used. And this is the only, perhaps, option for a homemade imitation of brickwork, which can be used for outdoor decoration... For these purposes (finishing the facade of the building), by the way, you can saw the brick in two halves. Everything is cheaper than buying tiles.
How to paint brickwork on a wall
If "wet" or "dusty" work is not your strong point, but you can draw at least a little, you can draw a brick wall. You will need acrylic paints, brushes, a pair of natural sponges, masking tape, thick paper plates for mixing paints. When diluting paints, remember that acrylic paints darken as they dry. And one more thing: they dry quickly, but freshly applied ones can be removed with a clean cloth soaked in water.
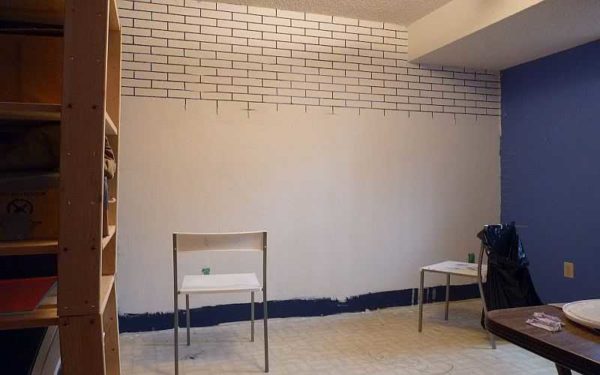
First, we prepare the workplace: cover the plinth and the adjacent floor with polyethylene or old wallpaper (it is better to fix it with tape). With masking tape we outline the borders - at the top, on the sides. At the bottom, the limiter is a plinth, although in order not to get dirty, it can be removed.
Drawing bricks on the wall
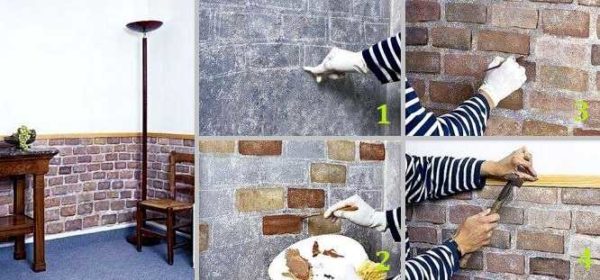
Further step-by-step actions:
- We paint the wall with white semi-matt acrylic paint. We leave to dry.
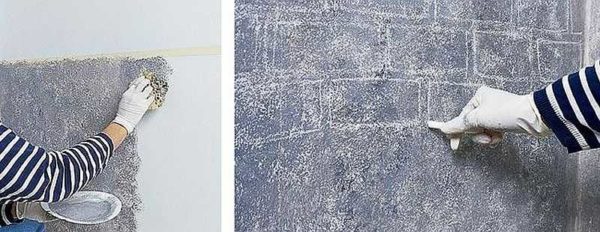
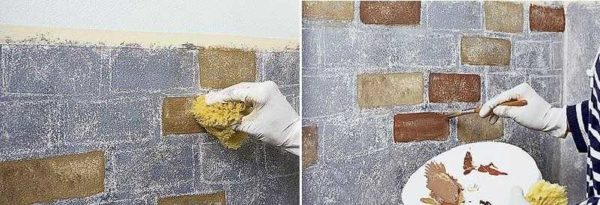
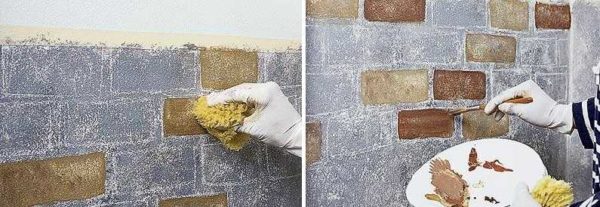
- Preparing the background paint. In one of the paper plates, mix 1/6 of the umber, 1/6 of the black paint and 4/6 of the titanium white. We immediately prepare a little paint, apply it to the wall with a sponge, simply applying the surface soaked in paint to the wall. You should not try to make a solid background - it should be torn, textured. In some places we put the paint more densely, passing twice, somewhere with a more transparent layer.
- On a dry background, by hand, not using a ruler, draw several rows of bricks. We focus on the standard for masonry: 25 * 6.5 cm, the thickness of the seam is 0.8-1.2 cm.When marking, keep in mind that using this technology it is easier to make the seam a little narrower by painting it than to try to expand it later.
- To paint over "bricks" it is necessary to mix ocher and sienna in different proportions, getting different shades of "brick" colors - from yellowish-orange to brownish. We got some shade, painted several "bricks" in arbitrary places. We mixed a new batch, painted over other bricks. Apply the paint with a brush, without trying to get a uniform surface or a dense layer of paint - the background layer is translucent. The edges of the "bricks" should also not be straight.
- For the traditional red-brown color, to sienna and red ocher, add a little light ocher, a little white. You can paint over several bricks in a row with this color.
- Another shade - add brown mars and some water to the above composition. Apply with a brush or sponge as desired.
- If we add white and burnt sienna to ocher and sienna, we get another color.
- We paint over all the bricks with these shades in random order.
- We dilute white and a little ocher, add water. The composition is applied with a sponge, acting like a tampon.
- Take an old toothbrush and burnt bone paint. We dip the bristles in the paint and spray on the wall, imitating the heterogeneity and texture of the clay brick.
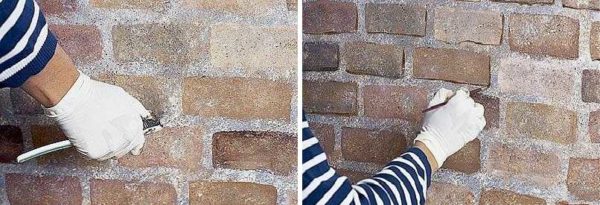
- We give the bricks volume: dip a thin brush into a mixture of umber and white. We bring all the bricks from below and to the right or left. Everything on one side, depending on where the window is located (on the opposite side from the window). The thickness of the liner is different, since the masonry and the bricks themselves cannot be perfect.
It takes much longer to describe than to do it all. A beginner can draw about 30 imitation brickwork squares per day. For maximum likelihood, there are several secrets, which we will discuss below.
Final touches
To make the brickwork painted on the wall as similar as possible to natural, there are several small secrets:
- If the shadows near the bricks are too harsh, they can be shaded with a toothbrush (another) dipped in a mixture of white and natural sienna, strongly diluted with water.
- After applying paint to a brick, do not wait until it dries. Take whitewash, add a little bit of umber, dip a sponge and "break" the uniformity of the paint with it, imitating a rough surface. To do this, slightly touch the "brick" with a sponge.
- On a plate next to the main batch, squeeze out a few other colors. We change the color in the course of painting. The brick will not be monochromatic. It has a smooth and not very color gradient.
- The dimensions of bricks, their edges, seams - all this does not have to be perfect.
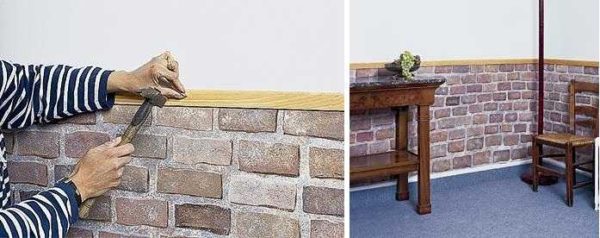
With some skill and diligence, it is possible to achieve that the painted brickwork looks like natural. The main rule: imperfection and heterogeneity.
Imitation brick for interior decoration from plaster mortar
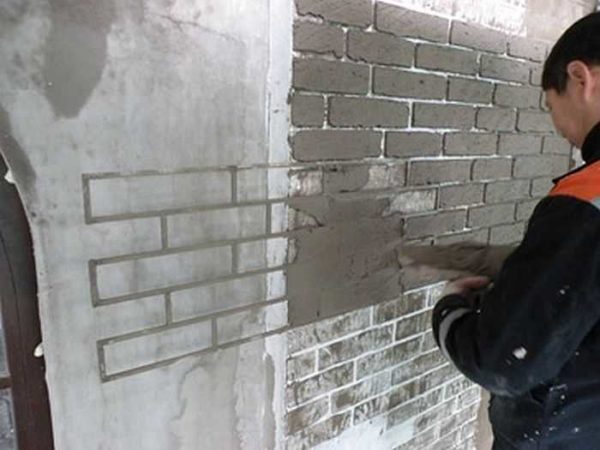
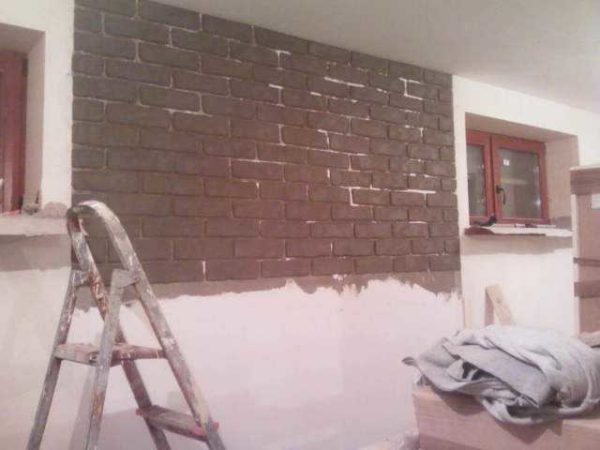
The general idea is simple: a layer of plaster or tile glue is applied to the wall, a seam is cut / squeezed through it. After processing the edges of the "bricks" and seams, painting, a semblance of brickwork of varying degrees of plausibility is obtained. Everything is simple, but there are significant differences and nuances.
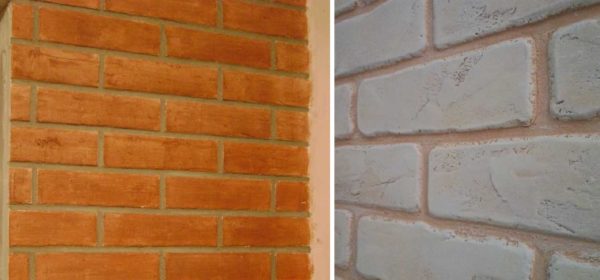
Imitation of bricks for interior decoration of premises from mortar, plaster (ordinary and decorative)
What and how to make a solution
The first question that arises is: what solution and what is needed from? There are many recipes. Here are some options:
- The usual cement-sand mixture: for 1 part of cement (ordinary Portland cement will do, but if you want to look for pink or white), take 3 parts of sifted fine sand, shut with water.
- Plaster mix and tile adhesive (approx. 1 to 1).
- Textured plaster of a suitable color, to which a roller (such as bark beetle, with sand) of a similar color, but a different shade, is added. They are mixed only slightly so that the composition remains heterogeneous.
- Ready plaster mix (dry) + putty, dilute PVA (the best option for finishing plywood, OSB, GKL).
Regardless of what you make the solution from, it should be semi-dry, and should not leak in any case. It will not need to be leveled, so its plasticity is not important to you, and additives - tile glue and PVA - will provide the adhesive ability. To adjust the consistency, add water in small portions.
Surface preparation
The wall on which we will make imitation of brickwork does not have to be flat. It should be free of dust and dirt, crumbling fragments and particles. This is where the requirements end.
Before starting work, it is better to prime the wall. The type of primer depends on the substrate. If the wall is concrete or loose, go through the "concrete contact". It will bind crumbling particles, create a sticky surface on which any composition fits perfectly. If we decorate with plywood, gypsum board or other similar material, you can do without a primer, or you can smear it with diluted PVA.
Technology No. 1. We use thin tape for drawing seams
First, paint the wall in the color of the joints between the bricks. Someone plans a gray-brown, someone white-gray. We cover the wall with paint of a suitable shade. On the prepared base using a narrow masking tape (1 cm or a little less / more), we apply the markings. The tape will mark the seams between the bricks, so we glue it horizontally, at a distance of about 6-6.5 cm from each other. When the horizontal lines are glued, we glue the short vertical ones.They are at a distance of 23-25 cm from each other - this is the length of a standard building brick, but decorative ones can be shorter.
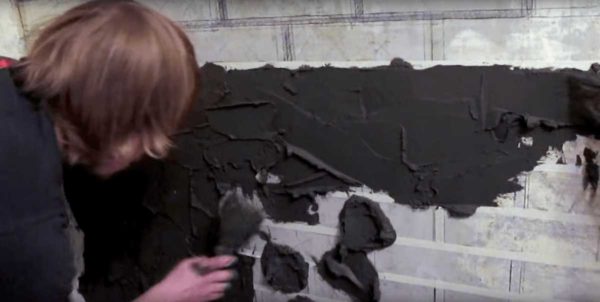
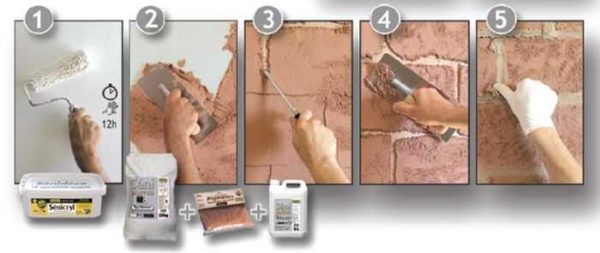
Now we take the solution and apply it to the wall. The layers are not the same, the thickness is 0.3-0.5 cm. We apply it according to the “how it will turn out” type, without achieving an even surface, smooth transitions ... How it happened, let it be so. We do not allow only obvious bald spots through which the wall shines. We filled the area, took a flat trowel (grater), slightly smoothed what happened. We leave it until it dries slightly: so that when pressed with a finger, the composition is slightly pressed.
We pry the ends of the horizontally glued strips of adhesive tape anywhere (sticking, leave the "tails"), pull, removing together with the solution adhered to the tape. We remove the entire mesh. The edges of the "bricks" thus turn out to be torn and uneven. This is normal. Even good.
Take a toothbrush or paintbrush with a fairly stiff bristle. With a toothbrush we go through the seams, removing the remains of the solution. At the same time, the edges of the bricks are rounded. Then we take a wider brush and use it to go through the surface, adding naturalness, removing too sharp edges. Leave to dry at room temperature for about 48-72 hours. You cannot forcibly dry - it will crack. Although, if you want to have cracks ... If the composition was not painted in the mass, it is up to painting.
Technology number 2: cut the "seams"
This way of imitation brick for interior decoration takes less time: no need to glue tape. Apply a solution to the wall surface. Everything is exactly the same as described above, only the layer can be thicker - up to 0.8-1 cm. After waiting for the solution to "grab" a little, we mark the seams. Here again, there are options:
- We stretch the twine along which the horizontal "seam" of the decorative brickwork will go. Using a knife, cut two lines. Do not use the ruler, cut by hand.
- We take a bar of the required width - 0.8-1.2 cm, press it down in the right place so that it is slightly imprinted. Cut the applied solution along the marked lines with a knife.
The second option is more accurate. But we must make sure that it is not too even. Although, due to the fact that the hand is shaking, the seam "walks" slightly, which gives a more believable look.
Having made horizontal seams, we proceed to cutting vertical ones - also by hand. The width of the bricks is about 6 cm, the length is around 23-25 cm. Having finished, we are waiting for 12-14 hours. Until the composition grasps enough to pick it off. When the concrete begins to crumble with a strong pressure, we take a wide screwdriver (the usual one, which is a "spatula") and with it we pick out the solution between the cut strips.
When the seams are cleaned, we take a stiff brush or brush, remove the remnants of the solution, crumbs. The bristles on the brush should be stiff enough. If the solution is dry, you can try more drastic measures - a metal brush.
Technology number 3: saw seams
This way of making an imitation of brickwork for interior decoration differs only in that instead of a knife we take an old hacksaw blade.
After waiting for the solution to set and not creep, mark the seam boundaries with a saw. Here you choose one of the methods described above. But you don't have to wait any longer: you paint the seams a little bit with a hacksaw. To make long horizontal seams quickly, but with vertical ones it is not very convenient, since the canvas is not very suitable for short distances.
This method is good because there is no danger of "overdrying" the solution. You can do "jointing" as soon as the solution hardens a little. In this state, it is easier to round off the edges of the bricks, giving them a natural "old age". Minus - you need to adapt, otherwise you can mess things up.
Making a mold for casting brick tiles from plaster
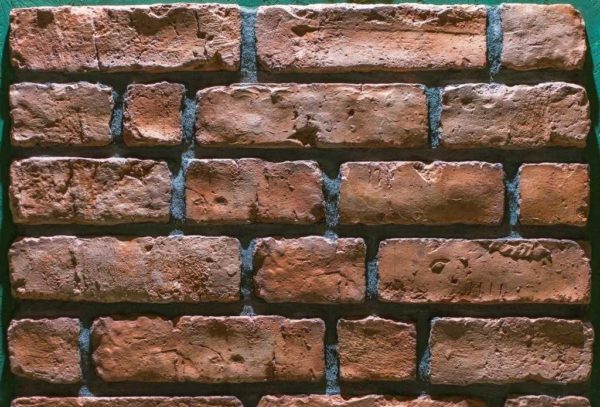
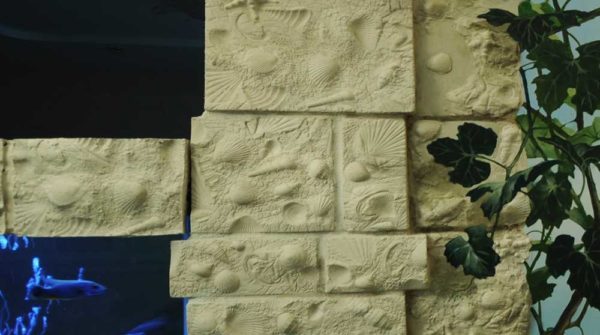
An imitation of brick for interior decoration in an apartment or house can also be cast: you can make gypsum tiles yourself in the form of bricks. To do this, an impression is removed from interesting specimens of bricks (a mold is made to form an artificial finishing stone), then plaster mortar is poured into it. The resulting tile is used for wall decoration. This technology is good because it allows you to prepare several forms in which you can make bricks of different colors for different rooms.
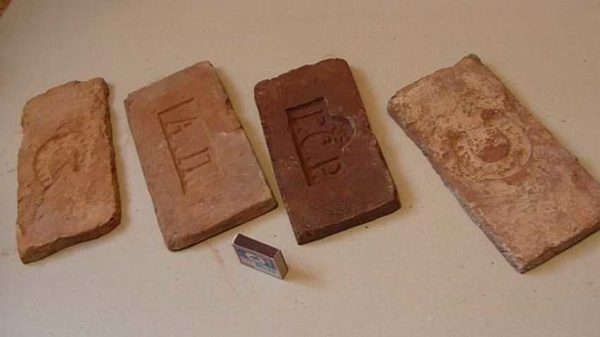
We find bricks interesting in shape and a few almost ordinary ones, but with various small defects. We will use them for casting the mold. It is desirable that there are at least a dozen of them, and better - more. More varied will result in "artificial brickwork".
On the side to be "multiplied", we apply grease or heated wax mixed with kerosene. This is necessary to prevent the silicone from sticking to the surface. When everything is dry, apply a layer of silicone sealant to the treated side. The layer thickness is 1-1.5 cm. We leave until the silicone is fully polymerized (the time depends on the type, it is written on the package).
When the silicone has hardened, we take polyurethane foam and coat the mold without removing it from the brick. After the foam hardens, remove the brick, level the bottom of the mold so that it stands level. Can be used by filling with plaster mortar. It sets quickly, if you have a dozen forms in 2-3 days, you can make a tile for a couple of squares imitating a brick wall. By the way, gypsum solution can be painted in bulk. Then new cracks and chips do not matter - like a brick.
How and what to paint
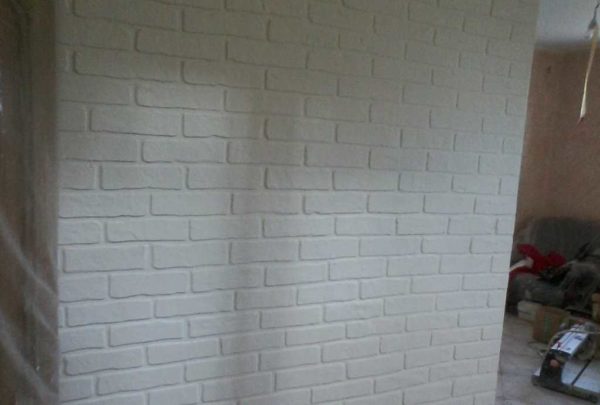
Recently, the white brick wall has become fashionable. If you are going to do just this, there is no problem: with a brush, the seams, the surface with a roller. If you want to have not too monochromatic, add a little tint to the base coloring composition - gray, brown, yellow ... but at least pink or blue. Paint with this paint. Add more white to the rest and with this, lighter composition, add highlights using a semi-dry roller, sponge, brush. If desired, you can apply the upper "shadows" with silver, bronze, adding a little gold. Here, as you like best.
If the seams in the imitation brick luggage should be darker, first go through them with a brush. Then paint over the very surface of the bricks with a roller with a short or medium pile. If you take a roller with an even shorter nap, dip it in paint of a different shade (lighter or darker - that's how it goes), in bronze, silver, gilding, etc. and with this roller, quickly, touching slightly, paint over the most protruding parts, you get an even more interesting effect. In general, you can experiment. With this approach, imitation brick becomes a design object and the main decoration of the interior.

