How to make a floor drain in the shower, in the bath
In recent decades, the concept of "good repair" has changed very rapidly. For example, some time ago, were very popular shower cabins... Built-in showers without a tray are gaining popularity now. For their arrangement, a floor with a drain is required, and for its organization, the installation of a ladder is required - a special device for collecting water from the floor.
The content of the article
Types of drains
Water drains are cast according to the type of installation. There are three types of them:
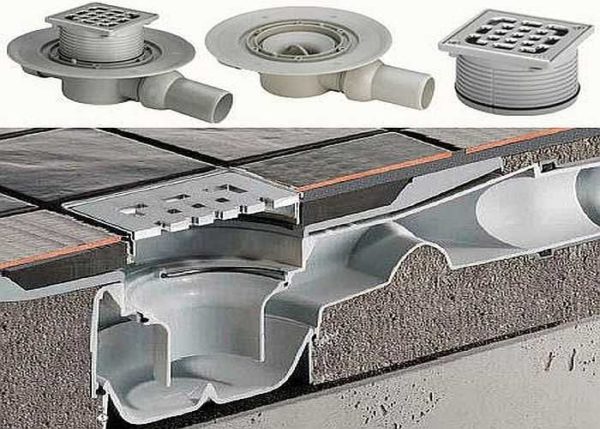
- Point. Usually, the inlet opening is small, the lattice is square, less often rectangular. Installed anywhere.
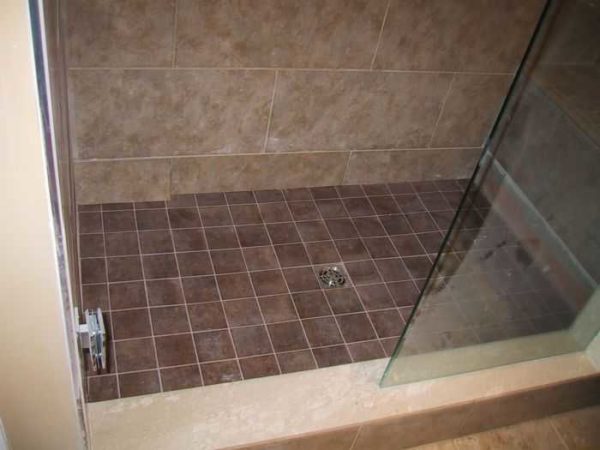
Spot drainage in the floor is most often done. For small shower cabins without pallet - he is the best choice
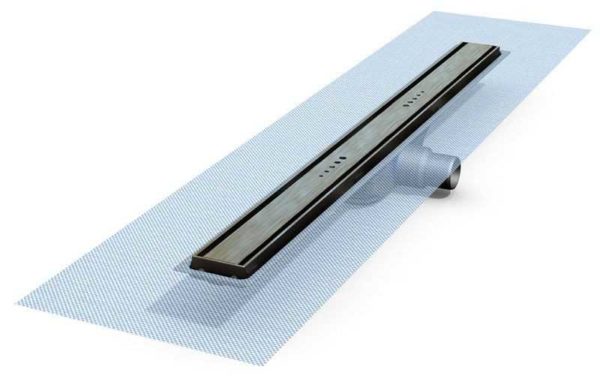
- Linear. The shape of the receiving chamber is rectangular, long and narrow. It is installed mainly along the walls, leaving some distance from them.
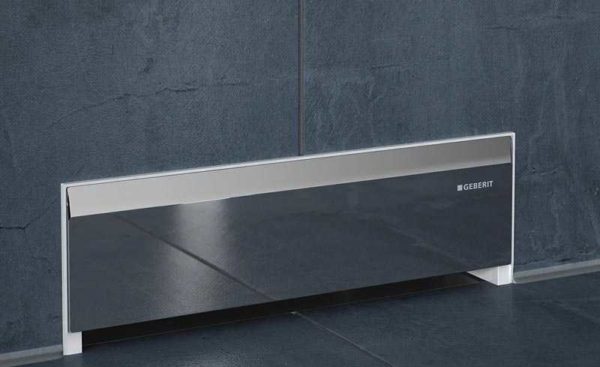
- Wall ladder. The drain hole is also long and narrow, but this design differs in that it is mounted not only in the floor, but also in the wall. The installation is walled up into the wall, there are sewer pipes behind the wall, and the drain hole itself is located exactly near the wall.
Most often, to make a floor with a drain, point ladders are used, much less often linear ones. The installation of wall ladders is generally quite a rare occurrence, since installation is possible only at the stage of major repairs, not only of the floor, but also of the walls. Moreover, such devices are much more expensive.
Gate types
In addition to different design solutions, the floor drain (point or linear) has gates of different types. A shutter is a device that prevents odors from entering the room from the sewer.
The simplest seal is a water seal. In these devices, there is a bend in the outlet pipe, in which water remains. It blocks odors. The disadvantage of such a system is the possibility of drying out. This happens if the water has not been drained for a long time. Also, the reason for drying out can be an incorrect installation (the slope is incorrectly selected) or the presence of floor heating - the warm floor in the bathroom "dries up" the water in the water seal.
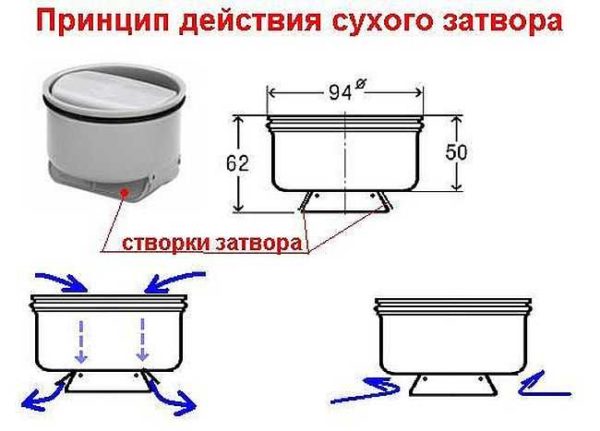
Dry closures for ladders are more reliable in this regard. They are of several types:
- Membrane. A movable spring-loaded membrane is installed, which, under the pressure of water, goes down, and in its absence, closes the drain hole, blocking access to gases from the sewer to the room.
- A membrane made of a material with a "molecular memory". The principle of operation is similar to the membrane one, but the reliability is higher - the springs can break, and the material simply striving to return to its original state is more durable.
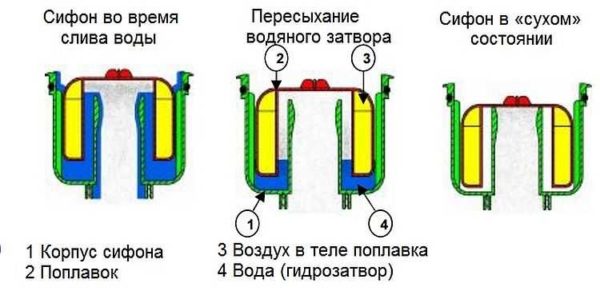
- Float. This system has a float. In the presence of water, it rises up, and when the water has left, it goes down and blocks the entrance to the sewer.
- Mint. The drain into the sewer is blocked by a device that, under the influence of gravity, tends to take a position above the drain.
Dry ladders are made mainly of plastic, gratings are made of stainless steel or also plastic. There are models with a built-in non-return valve. It prevents the rise of water when the pit overflows.When arranging a floor with a drain in an unheated bath, look for models that can be operated in cold weather (there are some).
How to raise the bathroom floor for the installation of a drain
The smallest floor drain has a height of 6-7 cm. At the same time, in order for the water to flow normally into it, it is necessary to provide a slope towards the drain hole of at least 1 cm per meter. This means that by making a floor with a drain, the height of the floor is increased to the walls. In this case, the zero point is the upper part of the installed ladder. How accurately the floor rises depends on the size of the shower or bathtub completely, if you plan to collect water from the entire bathroom area.
There are several ways to raise the floor in the bathroom or shower. When choosing a method, it is necessary to take into account the load-bearing capacity of the floor, otherwise the entire structure can be damaged.
Screed of different types
The most obvious way to slope the floor is to pour the floor screed. But the option is not always the best. Firstly, the usual cement-sand mixture is heavy, and secondly, it “matures” for a long time. But there are some good options.
- DSP. Normal cement-sand screed. The option is understandable, but very heavy - 15-16 kg per 1 sq. meter with a layer thickness of 1 cm. Not every overlap can withstand such a load. You have to be especially careful in old buildings.
- First pour a layer of expanded clay, pour a cement-sand mixture on top (thickness at least 3 cm). Not a bad option, but it must be considered according to the bearing capacity of the floor - it will withstand or not.
- Make an insulated floating screed. Slabs of eustruded polystyrene foam are laid down (not foam, it will crumple under the weight of the screed), pour DSP on top (the minimum thickness is also at least 3 cm). A good option is that the floor will not be as cold and the total mass is relatively small. This option is easily integrated floor heating system... More rational - electric, with water a lot of installation hassle.
- Polystyrene concrete or other types lightweight concrete... The option is very good, at the same time the problem of "cold floor" is also solved - since these materials have good thermal insulation properties. Here it will be necessary to look for a compromise solution - between the mass of the screed and the strength characteristics.
The most common way to make a drain floor is with a screed. It is just that the screed can be different, especially since the thickness of the "pie" is usually significant - rarely less than 12 cm - which makes it possible to make it combined. This allows you to provide the required reliability, but reduce weight. Most often, the floor with a drain is made insulated. But the maximum thickness of the insulation and the screed is 10 cm, which is clearly not enough to install most of the ladders. The remaining centimeters "get" by laying a rough screed, but it makes sense to make it from lightweight concrete - to reduce the load on the floor.
On the lags
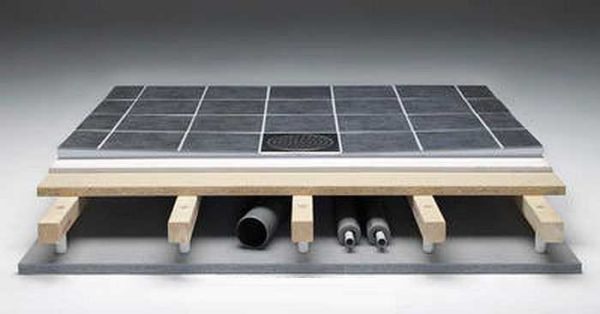
In order not to overload the floors, you can make a podium in the shower or bathroom on the logs. The option is controversial, since high humidity and wood do not combine very well, but sometimes this is the only way out. When choosing such a floor drain device, you must use well-dried wood. Before use, it is treated with protective compounds (according to the instructions, but at least twice). It is desirable to choose from those impregnations that are intended for outdoor use or for direct contact with the ground - they have a higher degree of protection. After the composition has dried, you can start working.
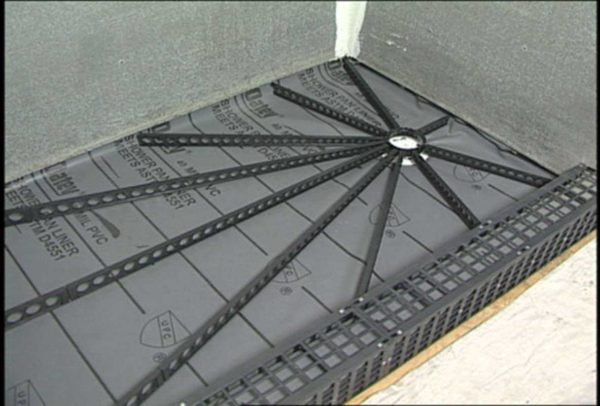
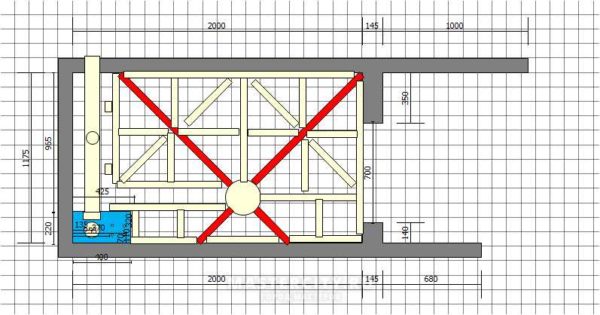
- Make it full of wooden logs. Lags are installed with an “envelope” centered at the location of the drain ladder. In general terms, the technology is as follows: holes are drilled in the floor screed for installing studs (M14-M16), the installation step is about 30 cm. Logs are attached to the studs (40 * 60 mm or 45 * 90 cm - from the size of the podium being built).Lags fit (you can hang up), taking into account the creation of the required slope. On them - moisture resistant plywood 12 mm or thicker, then gypsum fiber board, waterproofing, on it - tiles.
- Make a flat wooden floor on the logs, and lay the tiles with a slope using different thicknesses of glue. This option is good for small areas - if you drain it exclusively in a small shower stall.
The advantages of these methods are the minimum weight, the disadvantages are the complexity of execution, since attention to detail, high quality waterproofing is required.
As you can see, a floor with a drain in the bathroom or shower can be made in different ways. Choose the option that best suits your conditions.
Criterias of choice
In addition to choosing a shutter design, it is advisable to choose the size of the grid so that it is convenient to lay the tiles on the floor: it is desirable that the size of the drain be a multiple of the dimensions of the tiles (including mosaics). Pay attention to the material of the case. For a shower cabin in an apartment or house, plastic is quite suitable. These are the most affordable options. More expensive ladders to the floor made of polypropylene, even more expensive - from stainless steel.
The height of the ladder is also worth choosing. The minimum value is about 6-7 cm, the maximum is up to 20 cm. From the technical characteristics, this equipment has only a maximum throughput - how many liters it is able to take per minute. Choose depending on the maximum pressure that your shower can give out: the drainage capacity of the drain should not be less than the maximum amount of water dispensed. Both parameters are measured in liters per minute (l / min), so there should be no problem.
Floor with drain: work order
Although the designs of the ladders are different, all floor-mounted models are installed according to the same principle - the sequence of work is the same.
It is much more pleasant to stand on a warm floor in the shower, because a floor with a drain is most often made with a layer of thermal insulation. The best thermal insulation material for this is high density extruded polystyrene foam. It does not absorb water, does not rot, has excellent thermal insulation characteristics, and normally transfers loads (the weight of the screed and tiles will withstand without problems).
It is more convenient to work with a level (laser level), which has the function of a plane builder. It will make the job much easier.
Preparatory work
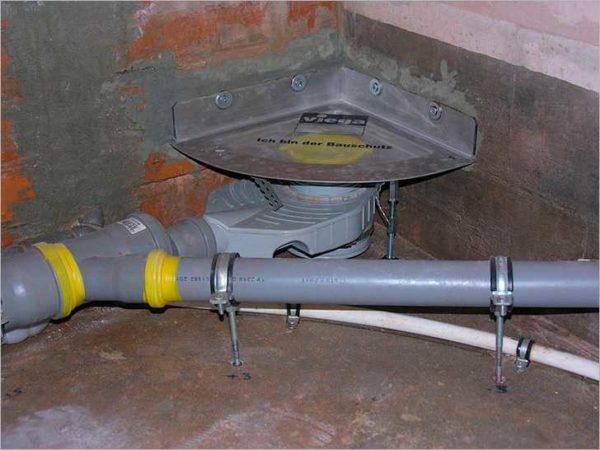
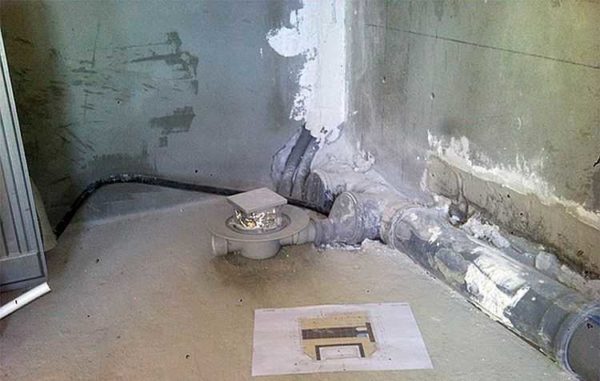
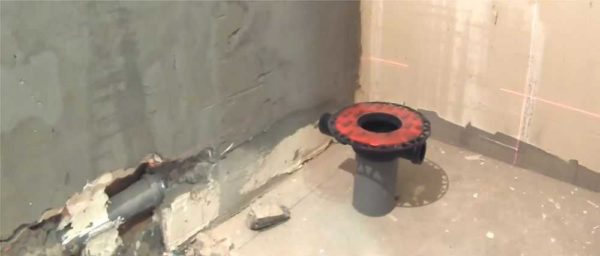
The first step is to remove a branch from the sewer riser, where the water will drain. The sewer pipe is laid with the required slope (2 cm by 1 meter), the bell is placed in the intended place for connecting the drain. After the sewer outlet is installed, take a ladder, make preliminary markings - it is necessary to mark the height of the screed on the walls of the shower stall:
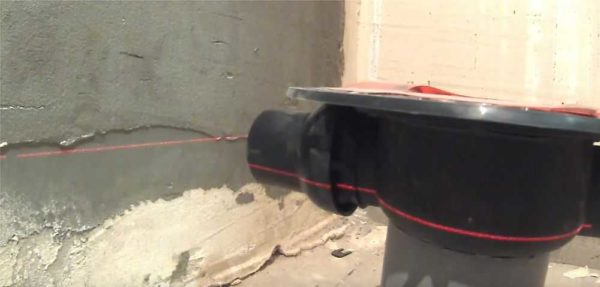
- We install the level so that it marks the axis of the withdrawn sewer pipe.
- We expose the ladder so that its axis is about 1.5 cm above the axis of the sewer pipe (see photo).
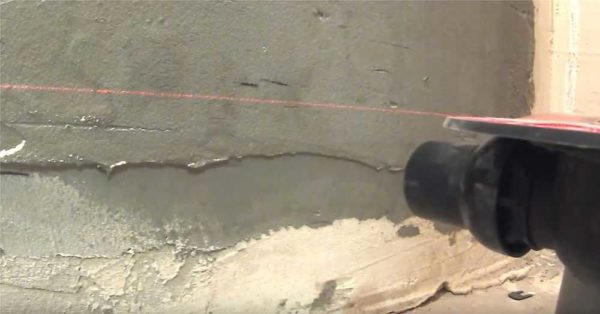
- After that, we raise the level beam to the height of the ladder grating installation (taking into account that the grating will also be installed, add its thickness).
- Since a slope is required for normal water flow. It is made 1-2 cm per meter in length. From the existing line of the ladder lattice, set the required distance upward.
- At the found mark, set the level beam. This will be the level of the screed, which must be maintained along the walls. You can draw this line with a pencil or marker.
Now you can measure the height to which you will need to raise the floor in the shower. In many ways, it depends on the parameters of the ladder (its height). Based on the figure received, it will be necessary to plan the screed layers and their thickness.
Determination of the thickness of the screed layers
Usually, it is assumed that 5 cm thick expanded polystyrene is laid in the screed. The minimum screed thickness is 3 cm (more is possible, less is not). This is in the center near the drain, towards the edges it becomes thicker (the required slope is created). From the existing line of the height of the screed, put down the resulting figure (add the thickness of the expanded polystyrene and the screed). It will be necessary to bring the rough screed to this level.
To reduce the load, a rough screed is made of lightweight concrete. It can be aerated concrete or expanded clay concrete. Wet work can be minimized. To do this, foam blocks can be laid out at the missing height, fastened with a reinforcing mesh. On top, you can fill the DSP with a layer of 3 cm.
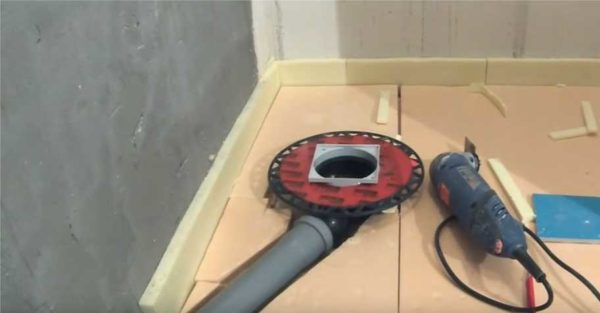
When installing such a base, a damper tape is needed along the walls. Since in the presence of expanded polystyrene or any other insulation, the floor may sag a little, it must be made disconnected from the walls. That's what a damper tape is for. It is exposed around the perimeter of the base. In height, it should be 1-2 cm above all layers.
You can use a special damper tape, you can use thin foam (1 cm thick or less). Even corrugated cardboard will do. The remaining tape is then cut flush with the screed. She did her job - we got a floating plate.
The poured screed must last at least a week - the concrete must gain at least 50% strength. After that, you can continue to work.
Waterproofing
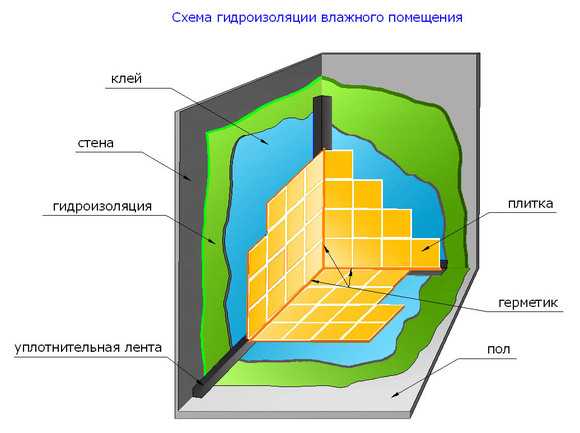
To prevent the floor with a drain from leaking, a good waterproofing is necessary in the shower stall. It is better to make it multilayer. One of the layers can be done at this stage.
They usually use a coating waterproofing. It can be bituminous mastic or special waterproofing for swimming pools. It is applied with a brush in several layers, with an approach to the walls of at least 30 cm. These mastics form on the surface an elastic waterproof film without seams and joints. This type of waterproofing is highly reliable.
Particular attention should be paid to corner processing. They can even be glued with a strip of rolled waterproofing (such as Gidroizol, etc.). Apply the first layer of coating waterproofing to the walls, then glue the joint between the wall and the floor with roll waterproofing (put on the same composition), and apply another layer on top.
For those who like to do everything with a margin of safety, the first layer of waterproofing can be laid even under the first corrective screed. All rules remain the same as described above.
Instead of coated waterproofing, you can use roll. But you will still have to lay it on bituminous mastic, smearing and pressing the seams well. The approach to the walls is about the same - about 30 cm. If the width of one roll is not enough, the panels are laid with an overlap of 15 cm, they are well coated with mastic.
Choosing a place for installing a drain
To make the tiles on the floor of the shower stall look at least normal, it is better to place the drain grate symmetrically with respect to the tiles. Therefore, first, on dry, lay the tiles on the floor (taking into account the seams). When laying out, remember to step back a little from the walls - by the thickness of the tiles and glue.
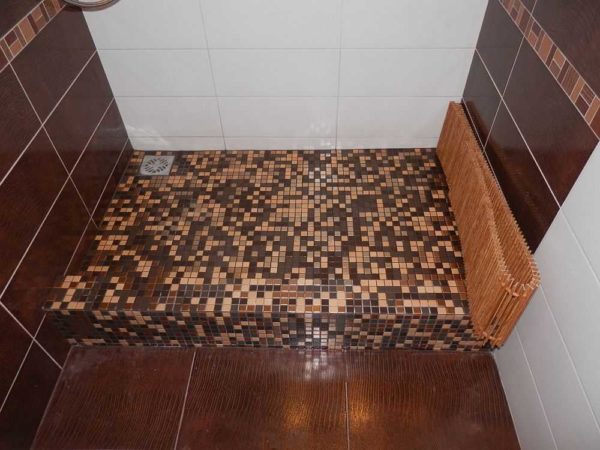
It is not at all necessary to make a drain in the center - it can easily be shifted to any wall. In this case, the farthest wall from the entrance was chosen so that there is less possibility that water will pour out of the booth
Next, we choose the position of the ladder so that everything looks good and, at the same time, it was necessary to make a minimum of trimming. They not only take up time, but also spoil the view.
Installation of a ladder and insulation
The next stage is the installation of the ladder and the installation of thermal insulation. A ladder is placed in the selected place, it is connected with a pipe to the sewer outlet (during installation, do not forget about the slope). After that, the insulation plates are laid. It is trimmed to fit over the installed ladder. A damper tape is also required around the perimeter.This time it is better to make it also from expanded polystyrene, but take less than 2-3 cm thickness is enough. At this level, expanded polystyrene will still prevent heat dissipation into the walls.
The joints of expanded polystyrene are glued with tape (so that moisture does not flow out of the concrete). If there are large gaps, you can fill them tightly with scraps, and then glue them.
Filling the screed
A reinforcing metal mesh is laid on the laid insulation. A ready-made mesh made of steel wire with a diameter of 3 mm and a pitch of 10 cm is enough. It is cut to size, laid on expanded polystyrene. Next, they start installing beacons.
Floor with a drain should be made with a slope towards the drain. To do this, you need to set the beacon strips. You can use standard beacons (at a hardware store) or wooden planks. They are installed so that their surface sets the required slope.
When the preparatory work is completed, the ladder bowl is oriented along the walls. This can be done using a square. At the same time, it is necessary to align the measurements as you determined when fitting.
The floor is poured with a drain and an installed ladder with an ordinary cement-sand mortar (for 1 part of cement grade not lower than M400), 3-4 parts of coarse sand. To make the coating water-repellent, you can add appropriate additives.
The poured solution is left to "ripen". This usually takes 28 days. At the same time, it is necessary to take care of the screed: maintain a stable humidity, avoid lowering the temperature (optimally - around + 20 ° C), direct sunlight. The easiest way is to cover a piece of matting (with an old bag) and / or plastic wrap. For the first 4-5 days, the surface must be moistened daily. It is more convenient to do this on a mat - there are no traces of drops. After 28 days, you can complete the finish - lay the tiles.

